

A fiberglass boat is an important investment that deserves your full attention to maintain its performance and aesthetics over the years. Unlike wood, which requires constant maintenance, or aluminum, which is subject to corrosion, fiberglass offers remarkable durability, but it is not without constraints. The gelcoat that protects the resin can tarnish, microcracks may appear, and osmosis awaits poorly maintained shells. Regular and methodical maintenance not only preserves the value of your boat, but also ensures your safety at sea by detecting potential problems in time. This comprehensive guide will guide you through all maintenance steps, from routine inspections to more technical renovations, including preventive actions that will make all the difference. Whether you own a cruising sailboat or a motor boat, these tips are suitable for all types of fibreglass boats.
General inspection: the points to be checked regularly
Regular inspection of your boat is the cornerstone of successful maintenance. Think of your boat as a living organism that speaks to you through small warning signs. A methodical inspection helps identify emerging problems before they turn into costly repairs. Ideally, a quick visual inspection should be carried out before each trip to sea, while a more thorough examination is required at least twice a year, generally in the spring before launching and in the fall before wintering.
Always start your inspection with an overview of the boat. Take a step back and look at the lines of your boat, look for deformations or areas that seem different from the rest of the structure. This first comprehensive approach will help you identify areas that require special attention. Bring a powerful flashlight, an inspection mirror, and why not a camera to document the condition of your boat over time. This photographic documentation becomes particularly valuable for monitoring the evolution of small defects and deciding when to intervene.
Shell: gelcoat, cracks, blisters and shocks
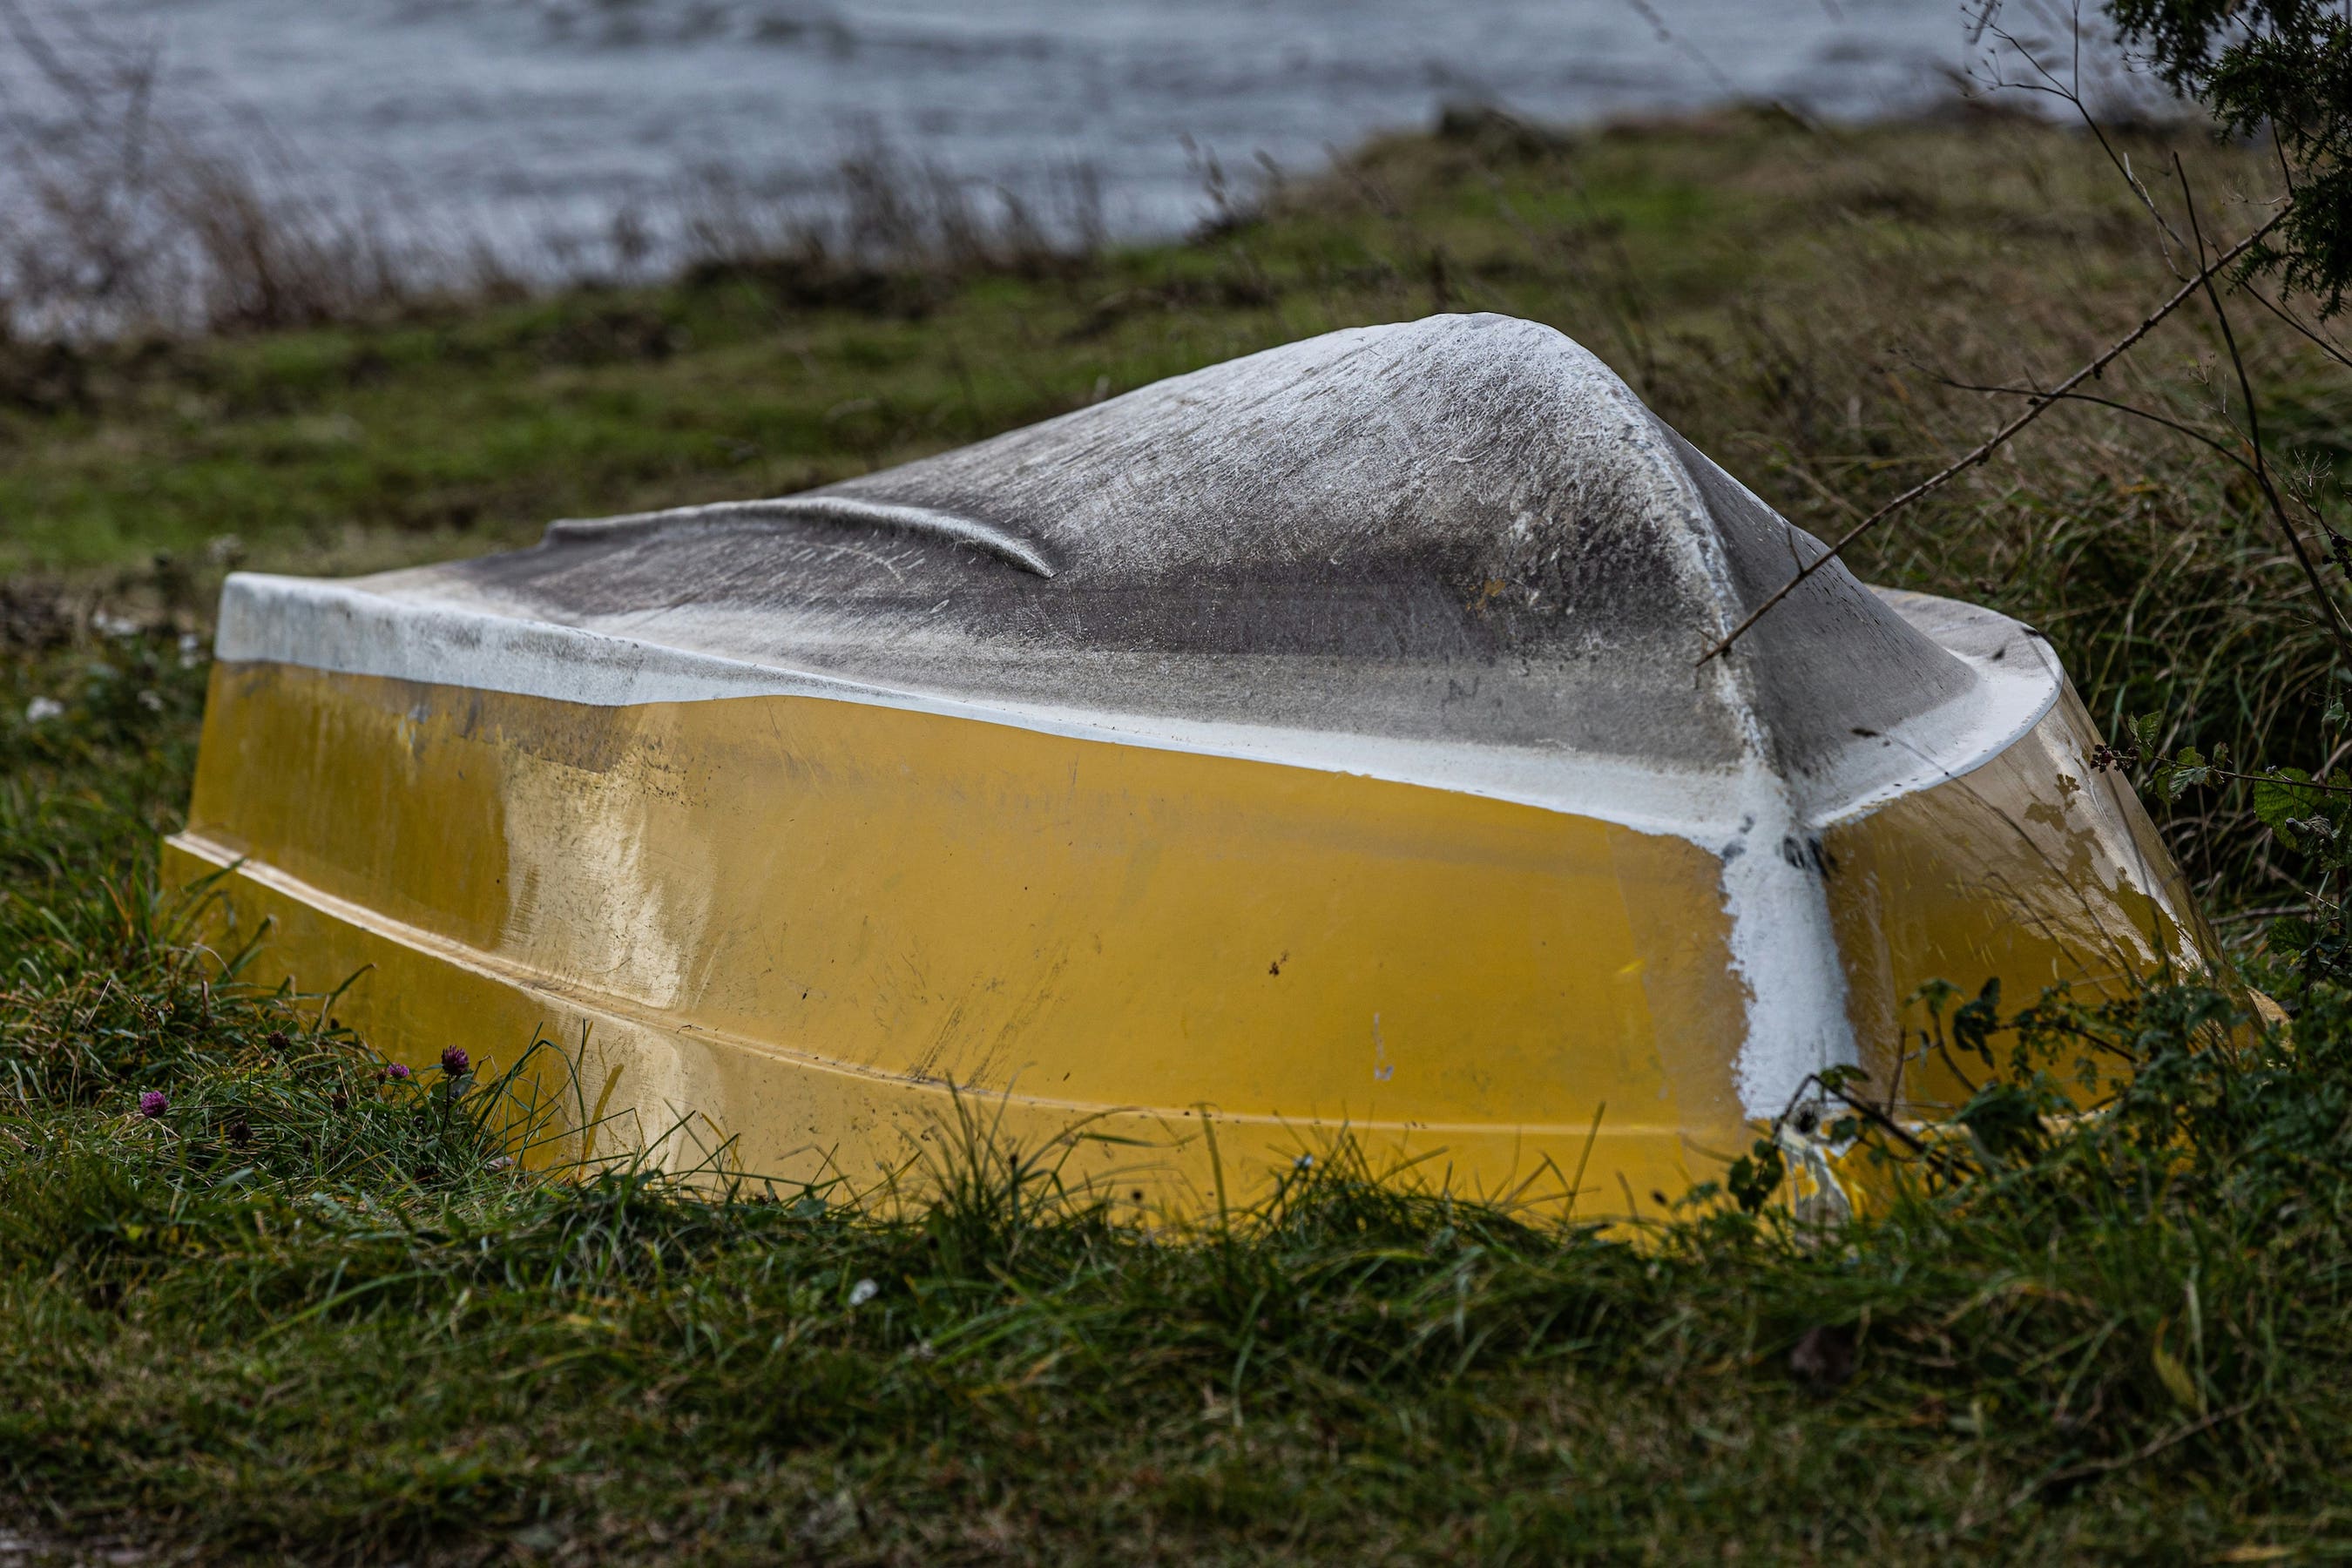
The hull is the most critical element of your boat, as it ensures its watertightness and structural strength. Gelcoat, the shiny protective layer that covers fiberglass, is your first line of defense against marine aggressions. Carefully examine the entire surface of the hull, focusing on particularly exposed areas such as the waterline, the bow, and areas of contact with the fenders.
Gelcoat cracks generally appear as fine lines, sometimes barely visible to the naked eye. They often appear in the shape of a star around a point of impact or in parallel lines in areas subject to repeated mechanical stress. Run your finger over suspicious areas: if you sense an irregularity, it's probably a crack that needs attention. These cracks, even superficial ones, must be repaired quickly because they allow water to gradually seep into the stratification.
Osmosis blisters deserve particular vigilance. They appear as small bumps, usually the size of a coin or smaller, that look like bubbles under the gelcoat. You can detect them by running your hand over the hull, especially below the waterline. If you pierce a blister, you will notice a brownish liquid with a characteristic vinegar odor, a sign of ongoing hydrolysis. Osmosis is a gradual phenomenon that can seriously compromise the structural integrity of your boat if it is not treated in time.
Impacts and shocks generally leave visible marks: discoloration, deep scratches, or surface deformations. Gently tap these areas with your knuckles: a sound that is hollow or different from the rest of the shell indicates a possible internal delamination that requires professional inspection. Areas near the keel, where the boat may touch the bottom, as well as the edges of the transom, are particularly vulnerable to impacts.
Bridge and superstructures
The deck of your boat is subject to constant stresses: trampling, exposure to UV, thermal variations and various impacts. Start your inspection by walking slowly over the entire surface of the bridge, paying attention to the sensations under your feet. An area that seems softer or flexes abnormally may indicate delamination of the bridge sandwich or degradation of the plywood or foam core.
The joints between the deck and the hull are critical areas where water can seep in. Inspect the deck line carefully, especially around pass hulls, anchor chain crossings, and mooring shafts. Look for traces of rust or humidity that indicate an infiltration. Superstructures such as the roof, canopies and downpipes must also be examined carefully. Angles and junctions between horizontal and vertical surfaces are natural weak spots where gelcoat can crack.
The anti-slip surfaces of the bridge require special attention. Over time, they can become clogged with dirt and lose their effectiveness. Also, check that the anti-slip coating adheres well to the support. If you notice areas where the upholstery is lifting or peeling off, it will need to be replaced to avoid the risk of slipping. Portholes and panoramic windows should be inspected from the inside and outside: look for cracks in the transparent material and check the condition of the seals that can harden and crack over time.
Hardware and fixings
The fittings include all the equipment fixed to the deck and the hull: cleats, winches, strings, balconies, chandeliers and other fittings. These elements are subject to considerable forces, particularly during navigation, and their attachment must remain flawless to guarantee your safety. Grasp each piece of hardware and try to make it move slightly: any abnormal movement indicates loosening of the fasteners or damage to the surrounding laminate.
Visually inspect each visible fastener. The screws and bolts should be securely tightened, with no evidence of excessive corrosion. If you notice traces of rust or verdigris around a fastener, this may indicate water infiltration. Periodically removing hardware to check the condition of silicone or polyurethane sealant joints is a good practice. Take the opportunity to clean the contact surfaces and renew the sealant if necessary.
Channels and balconies deserve special attention because they play an essential role in on-board safety. Check the tension of the cables or tubes, inspect the crimps and terminations, and make sure that the stanchions have no gaps in their sockets. Wire cable transits in the bridge are potential points of infiltration that must be perfectly watertight. Winches require annual disassembly and greasing to maintain their effectiveness and extend their lifespan.
Living works: skittle, saffron, appendages
Living works refer to all the submerged parts of your boat when it is floating. These areas are subject to particular constraints because they constantly evolve in an aggressive environment. The inspection of living works generally requires a water outlet, whether on a dry dock, a bar or using a handling cart.
The keel, whether integrated monoblock or ballast, is the most important appendix to be inspected. Look for impacts that may have weakened the junction between the keel and the hull, especially if your boat has hit the bottom. For ballast keels, check the condition of the mounting bolts: any trace of rust, oozing or deformation should alert you. A faulty keel bolt represents a major risk that can lead to the loss of the keel at sea. Do not hesitate to call a professional to check the tightening torque of the bolts if you have any doubts.
The rudder and the rudder wick are subject to significant mechanical stresses during each maneuver. Inspect the rudder surface for shocks, deformations, or softened areas that would indicate water entering the core. Also check the rudder shaft and its bearings: any excessive play must be corrected as it will worsen quickly and compromise your ability to steer. Shaft outlet bearings and seals are also worth your attention, as a leak at this level can lead to water entering the boat.
Other appendages such as the keel bulb, fins, fins or stabilizers must be inspected according to the same principles. Look for areas of galvanic corrosion, especially at junctions between dissimilar metals. The sacrificial anodes attached to these appendages must be replaced when they are consumed by more than fifty percent to continue to effectively protect the metal parts of your boat. A connected surveillance system such as the Oria Marine IoT box can also help you plan your inspections and monitor the evolution of the condition of your boat between two water exits.
Fiberglass boat cleaning
Regular cleaning of your boat is not only about aesthetics, it actively contributes to its conservation. Organic deposits, saline residues, air pollution and various stains progressively attack the gelcoat and accelerate its aging. Methodical cleaning carried out with the right products allows you to preserve the brilliance of your boat while detecting possible problems early.
Cleaning is envisaged according to several levels of intervention. A quick rinse with fresh water after each trip to sea is the simplest and most effective way to eliminate salt which, by crystallizing, can damage the gelcoat and corrode the metal parts. This rinsing only takes a few minutes but makes all the difference in the long run. A more thorough cleaning with specific products is generally done once a month during the sailing season, while a complete cleaning including polishing takes place once or twice a year.
Recommended products and cleaning frequency
The choice of cleaning products directly influences the longevity of your gelcoat. Always choose products specifically designed for marine use rather than household detergents that may be too aggressive. A good boat shampoo must clean effectively without attacking the gelcoat, while being biodegradable to respect the marine environment. Look for pH-neutral formulations that won't harm gelcoat or seals.
For routine cleaning done every two to four weeks, a mild shampoo diluted in water is more than enough. Use a sponge with large cells or a soft bristle brush for vertical surfaces and the bridge. Brushes with too hard bristles scratch the gelcoat and create micro-abrasions that cause dirt to stick later on. Always work from top to bottom to avoid re-soiling areas that have already been cleaned, and rinse thoroughly with clean water to remove any soap residue.
Some areas require more specific products. Stainless steel surfaces can be cleaned with special products that dissolve traces of lime and salt while leaving anti-fingerprint protection. The cockpit fabrics and cushions benefit from textile cleaners suitable for marine use, resistant to salt water and UV. Plexiglas or polycarbonate windows and windows require specific non-abrasive cleaners to avoid scratching or opacifying them.
The cleaning frequency adapts to the use of your boat and its environment. A boat that regularly sails in tropical areas with high sun exposure will require more frequent cleaning than a boat that is wintered several months a year in a temperate region. Likewise, a boat docked near an industrial area or commercial port will get dirty more quickly than a boat anchored in a preserved bay. Adapt your maintenance routine to these parameters to keep your boat in optimal condition without wasting time and products.
Techniques for removing stubborn stains (oil, algae, rust)
Despite regular maintenance, some stains resist routine cleaning and require targeted interventions. Oil stains, whether from the engine, maintenance products or external pollution, quickly become embedded in porous gelcoat. To remove them, apply a specific marine degreaser directly to the stain and let it work for a few minutes before scrubbing with a sponge. For old or very encrusted stains, you can use a mixture of baking soda and water to form a slightly abrasive paste that you will apply in circular movements.
Algae and marine microorganisms gradually colonize areas near the waterline, creating green or brown trails that are difficult to remove. An anti-algae cleanser dissolves these biological deposits without damaging the gelcoat. Apply the product, leave it on for the recommended time, then scrub with a medium bristle brush. For particularly invaded areas, several applications may be necessary. Be sure to rinse thoroughly as the residues of these products can leave traces or create discolorations.
Rust marks generally appear around metal fasteners, chain passages, or where metal objects have been placed. These characteristic orange stains penetrate deep into the porous gelcoat. A special marine rust remover dissolves iron oxides without attacking the surrounding gelcoat. Apply the product locally, let it work, then rinse thoroughly. In the most stubborn cases, you may have to repeat the operation or use a slightly abrasive polishing paste to remove the rust-colored surface layer of the gelcoat.
The black drips that appear under bridge joints, coils, or gas bottles come from the degradation of sealants and joints. A powerful degreasing cleaner can usually be used to remove them, but they will reappear until you replace the faulty seal that caused them. After cleaning up these traces, identify where they came from and plan to replace the aged joints to prevent them from coming back. These drips, if they are neglected, can become permanently embedded in the gelcoat and become impossible to remove completely.
Deep cleaning of the deck and anti-skids
The deck of your boat accumulates a combination of organic dirt, saline residues, footprints and atmospheric deposits that are particularly embedded in anti-slip surfaces. The latter, with their raised texture, trap dirt in their hollows and require an adapted cleaning technique. A simple wipe with a sponge will not be enough to remove impurities stuck in the rough spots.
To effectively clean anti-slip surfaces, use a brush with semi-rigid bristles and a good boat shampoo. Scrub using circular movements with moderate pressure to remove dirt without abrading the surface. For very dirty areas, let the shampoo work for a few minutes before brushing, this makes stain removal much easier. A pressure washer can be used carefully to rinse and remove anti-skid materials, but keep a distance of at least 50 centimeters and do not use excessive pressure that could damage the gelcoat or peel off joints.
Oil stains on the deck are particularly problematic because they create dangerous slippery areas. Treat them immediately with a specific degreaser, scrub vigorously, then rinse thoroughly. If the oil has penetrated deep into the pores of the anti-skid, you may need to apply an absorbent paste such as talc or Sommières soil and leave it on for several hours before brushing and rinsing.
The white areas of the bridge tend to yellow over time under the effect of UV and oxidation. A special anti-yellowing cleanser restores shine to tarnished areas. For severe cases, light polishing followed by the application of anti-UV protection is required. Remember to also clean hard-to-reach areas such as halyard passages, sail boxes, technical boxes and the inside of removable deck panels. These hidden areas accumulate moisture and dirt, creating a favorable environment for mold to develop.
Tips for protecting the shine of gelcoat
Maintaining the shine of the gelcoat is a long-term goal that goes beyond simple cleaning. New gelcoat has a smooth, shiny surface that reflects light evenly. Over time, UV exposure, oxidation, micro-scratches and the accumulation of deposits tarnish this surface and give it a characteristic chalky appearance. An effective preventive strategy makes it possible to delay this natural aging and to maintain the brilliance of your boat for much longer.
The first tip is to systematically rinse your boat with fresh water after each sea trip. This simple habit eliminates salt before it crystallizes and attacks the gelcoat. Salt acts as a microscopic abrasive that, combined with wind movement and friction, creates micro-scratches in the gelcoat surface. By rinsing immediately, you prevent this gradual deterioration. If possible, use demineralized water for the final rinse, as tap water leaves traces of lime that tarnish the shine.
The regular application of a protective wax is your best ally in maintaining shine. After a good cleaning and possibly polishing, apply a quality marine wax that will form a protective barrier between the gelcoat and external aggressions. This protective layer also facilitates subsequent cleaning because dirt adheres less easily to the waxed surface. Renew the wax application two to three times a year depending on the exposure of your boat.
Using a protective cover when the boat is docked is an excellent preventative measure. A good breathable cover protects the gelcoat from UV, bird droppings, air pollution and various projections. Make sure that the cover is well ventilated to avoid condensation, which could encourage mold and mildew. For boats stored ashore, a properly installed tarpaulin makes all the difference by considerably slowing the aging of the gelcoat.
Avoid cleaning your boat in direct sunlight. Heat accelerates the evaporation of products that dry before you can rinse them off, leaving traces and residues that tarnish the gelcoat. Prefer cleaning early in the morning, in the late afternoon, or on an overcast day. Also, never allow cleaning products to dry on the gelcoat as they can create permanent discolorations. Work in small sections that you rinse immediately after cleaning.
Renovation and protection of gelcoat
Gelcoat, while designed to last, is inevitably subject to the effects of time and the elements. Renovating the gelcoat is an essential step in reviving a boat that has lost its shine or shows signs of wear and tear. This operation goes beyond simple cleaning and involves more in-depth work aimed at restoring the gelcoat surface and restoring its protective properties. The good news is that with the right products and techniques, you can often do a satisfactory renovation yourself without calling in a professional.
The renovation of gelcoat is part of a gradual approach that respects the principle of “less to more”. Always start with the least aggressive methods and only intensify your action if the results are not satisfactory. This caution will prevent you from removing too much material and weakening your gelcoat unnecessarily. Remember that gelcoat has a limited thickness, generally between 400 and 800 microns depending on the boat, and that each polishing removes a thin layer.
When to polish your boat: signs of wear and loss of shine
Identifying the right time to polish your boat requires careful observation of the condition of the gelcoat. Several visual and tactile signs will tell you that polishing is becoming necessary. The most obvious is the loss of overall brilliance: when you look at your case under low light, it should reflect the surrounding objects sharply like a mirror. If the reflection becomes blurry or if the surface seems hazy, it is because the gelcoat has oxidized on the surface and polishing is required.
Another reliable indicator is the chalky appearance. Run your hand over an exposed area of the shell, such as the broadsides or the transom: if your palm comes out with a slight whitish powder, it means that the gelcoat has oxidized. This oxidation results from the degradation of the resin on the surface under the effect of UV. A highly oxidized gelcoat takes on a milky hue and loses its color depth. Dark-colored boats generally show these signs more quickly than light-colored boats.
The presence of visible micro-scratches also indicates that polishing will be beneficial. These fine scratches come from repeated friction during cleaning, from contact with fenders, from moorings that rub, or simply from abrasion by particles suspended in the air and water. Under direct lighting, you will notice that the surface is no longer uniformly smooth but has a multitude of small lines that diffuse the light. Proper polishing will remove these micro scratches and restore a perfectly smooth surface.
The frequency of polishing depends largely on the environment and the exposure of your boat. A boat that is constantly in the water in a tropical climate will probably require annual polishing, while a boat wintered ashore in a temperate region may be content with polishing every two or three years. The most exposed parts such as the deck, transom, and starboard flanks (exposed to afternoon sun in the northern hemisphere) will oxidize more quickly than protected areas. You can therefore adapt your intervention by polishing only the areas that really need it.
How to do effective polishing
Polishing gelcoat is an art that requires patience and method. Contrary to what some boaters think, polishing is not simply a matter of scrubbing vigorously with an abrasive product. Effective polishing respects a methodical progression that progressively refines the surface until the desired shine is obtained. This operation requires a considerable investment of time for an entire boat, but the results will literally transform the appearance of your boat.
Before starting the actual polishing, make sure the surface is completely clean. Wash your boat thoroughly with a suitable shampoo and rinse thoroughly. Then dry the surface with a chamois or a microfiber cloth to avoid water marks. Any dirt or particles that are present during polishing may further scratch the gelcoat instead of smoothing it out. Work ideally in the shade or on an overcast day, as the sun's heat causes polishes to dry out too quickly and complicates work.
Polishing generally consists of three steps using increasingly fine products. The first step, called “compounding,” uses polishing paste containing relatively coarse abrasives that eliminate deep oxidation, micro-scratches, and surface defects. Apply the compound to a suitable polishing pad, whether it is a wool pad for a rotary polisher or a foam pad for an orbital polisher. Work in sections of approximately fifty square centimeters, making cross passes until the product becomes transparent and the surface returns to shine.
The second step uses a finer polish that refines the work done during roughing. This polish removes the micro-scratches left by the abrasives in the compound and starts to bring out the deep shine of the gelcoat. Change the pad to a softer foam and work with the same cross movements. You will notice that the gelcoat gradually takes on an increasingly pronounced shine. Wipe off residue regularly with a clean microfiber cloth to assess your progress.
The third step, called finishing or polishing, uses a very fine product that provides the final shine and eliminates the last blemishes. This step can be done by hand with a microfiber cloth if you have worked meticulously in the previous steps, but using a polisher with a very soft finishing pad will give superior results. The final polish reveals all the depth and brilliance of the restored gelcoat. Your boat should now reflect objects like a mirror.
A few practical tips will improve your results. Always keep your polisher moving to avoid creating holograms or overheating zones. Don't press too hard: let the product and the machine do the work. Clean your pads regularly by tapping them against a special brush or by rinsing them to remove residues that reduce their effectiveness. Work methodically in defined sections to avoid missing areas. Protect joints, rubber parts, and fittings with masking tape to prevent them from being stained by polishes.
Application of marine wax or protective sealant
Once the gelcoat is polished and restored, it would be a shame not to protect it effectively to keep the results of your work as long as possible. The application of protection is therefore an inseparable step from polishing. Two main types of products are available to you: traditional marine waxes and modern synthetic sealants. Each has specific advantages that you should know in order to make the choice that best suits your needs.
Traditional marine waxes, often based on carnauba, create a warm and deep protective layer that enhances the shine of the gelcoat. Their application is simple and their aesthetic result remains unequalled. However, their durability remains limited, generally between two and four months depending on the exposure and use of the boat. Waxes therefore require regular applications to maintain constant protection. They are generally applied to a clean and dry gelcoat, in sections, using circular movements with a foam applicator. Let the wax dry until a whitish veil appears, then polish with a clean microfiber cloth using circular movements. The brilliance obtained is immediate and spectacular.
Synthetic sealants represent a modern alternative that offers significantly greater durability, often from six months to a year. These products based on synthetic polymers create a chemical bond with the gelcoat that is more resistant to washing, UV and marine aggressions. Their application differs slightly from traditional waxes: strictly follow the manufacturer's instructions regarding drying time and method of application. Some sealants can be applied to slightly damp gelcoat, others require a perfectly dry surface. The shine obtained is generally slightly less hot than with natural wax, but the superior protection more than justifies this compromise.
There's nothing stopping you from combining the two approaches by first applying a synthetic sealer as a base layer and then adding a layer of carnauba wax on top to maximize both protection and aesthetics. This technique, called layering, combines the best of both worlds. First apply the sealant and let it cure completely according to the manufacturer's recommendations, usually twelve to twenty-four hours. Then apply your favorite wax on top. You will thus benefit from the durability of the sealant and the beauty of the wax.
The application must cover all exposed gelcoat surfaces: hull, deck, roof, superstructures. Don't forget the less visible but just as exposed areas such as the inside of the deck boxes, the hilories, or the back of the board. The more complete your protection, the better your gelcoat will be preserved. Repeat the application at the frequency appropriate to the product used. A simple test to find out if your protection is still active is to pour water on the gelcoat: if it beads up in small drops that roll easily, the protection is active. If the water spreads out in a continuous film, it is time to reapply your wax or sealant.
Gelcoat repairs: scratches, chips, microcracks
Even with the most conscientious maintenance, gelcoat damage inevitably occurs as the sailing seasons pass. Fortunately, most minor damage can be repaired with a bit of patience and the right products. Repairing these defects quickly prevents them from getting worse and prevents water from entering the laminate, which could cause much more serious damage.
Superficial scratches that have not gone through the full thickness of the gelcoat are treated relatively easily. If you pass the nail perpendicular to the scratch without feeling a snag, it is probably a superficial scratch. Localized polishing with a fine compound followed by polishing often makes these marks disappear completely. For deeper scratches that catch the nail, you'll need to fill the scratch with a repair gelcoat that's the same color as your boat. Clean the area well, apply the repair gelcoat with a small brush or spatula, filling in slightly more than necessary as the product will retract slightly as it hardens. Once the repair gelcoat has hardened, gradually sand the area with progressively increasing grain papers until a flat surface is obtained, then polish to make the repair disappear.
Splinters, often caused by impacts with hard objects, create craters in the gelcoat. The treatment is similar to that for deep scratches but sometimes requires reconstructing several layers. Start by cleaning the damaged area thoroughly and removing any parts of the gelcoat that come off or are cracked around the impact. Degrease with acetone and let it dry completely. Apply repair gelcoat in multiple thin coats rather than a single thick coat for better results. Allow each coat to harden before applying the next one. The last layer should slightly extend beyond the surrounding surface. Then sand gradually to obtain a flat and even surface, then polish the entire area thoroughly to make the repair disappear.
Star microcracks, called “crazing”, often appear around attachment points that are subject to stress or after an impact that has weakened the gelcoat without creating a visible hole. These cracks look like a spider web and need to be treated quickly as they allow water to seep in. The treatment consists of slightly widening the cracks with a Dremel tip or a similar tool to create small V-grooves that can receive the repair gelcoat. Clean and degrease thoroughly, then fill the grooves with repair gelcoat. Once cured, sand and polish the area. For cracks that are very extensive or located in structurally important areas, consult a professional as they may indicate a deeper problem in the laminate.
The success of a gelcoat repair depends largely on the precision in color matching. Manufacturers offer gel coats in standard colors, but your boat may have changed color slightly over time under the effects of UV. Do not hesitate to test an inconspicuous area to check that the shade matches. Some professionals can create custom shades by mixing different gelcoats to achieve a perfect match. Always keep some repair gelcoat in the right color on board to treat minor damage right away before it gets worse.
Osmosis prevention and treatment
Osmosis is the fear of any fiberglass boat owner. This complex physicochemical phenomenon can seriously compromise the structural integrity of your shell and require extremely expensive repairs if it is not detected and treated in time. Understanding the mechanisms of osmosis and knowing the warning signs will allow you to take action before the damage becomes irreversible. The good news is that with regular monitoring and appropriate preventive measures, osmosis can be avoided or at least significantly delayed.
Osmosis occurs when water passes through the gelcoat barrier and comes into contact with the resin and glass fiber laminate. This infiltration triggers a chemical reaction that hydrolyzes the resin, creating an acidic liquid and internal pressures that lift the gelcoat in the form of blisters. The process is gradual and may take several years to become visible, but once initiated, it tends to accelerate if no action is taken. Boats that are kept constantly in water are more exposed than those that are regularly taken out and dried.
How to recognize osmosis
Early detection of osmosis is your best chance to limit damage and treatment costs. There are several signs that should alert you during your regular inspections. The most characteristic symptom of osmosis is the appearance of blisters or blisters on the gelcoat surface, usually below the waterline where immersion is permanent. These blisters vary in size, from a few millimeters to several centimeters in diameter. They look like bubbles trapped under the gelcoat and are generally easily detected by touch by passing your hand over the shell.
The visual aspect evolves according to the stage of progress of osmosis. At first, the blisters may be isolated and few in number. At a more advanced stage, they can cover large areas and even join together to form large uplifted areas. The color of the gelcoat in affected areas may also change, often taking on a darker shade or presenting discolored areas. If you pierce an osmosis blister with a needle or a sharp tool, a liquid will flow out, which is usually brownish in color and has a characteristic sour odor reminiscent of vinegar. This liquid is acidic and results from the degradation of the resin by hydrolysis.
Another sign of osmosis is the variations in the sound the shell makes when you tap it. An area affected by osmosis will sound differently than a healthy one, with a duller or duller sound, because the water that enters changes the acoustic properties of the laminate. Perform this tap test methodically over the entire submerged surface of the shell using a coin or a plastic hammer. The tone changes will show you potentially affected areas that deserve further consideration.
Specialized measuring devices such as moisture meters can detect osmosis at a very early stage, even before visible blisters appear. These instruments measure the humidity level in the laminate and can reveal abnormally humid areas that indicate water infiltration. An expert in shell diagnostics can carry out this type of measurement during a complete expertise. If you are considering buying a used boat, such expertise is highly recommended as it may reveal an emerging osmosis problem that would not be visible during a simple visual examination.
Professional treatments and preventive solutions
When osmosis is diagnosed, the choice of treatment depends on its extent and severity. For mild and localized osmosis, partial treatment may suffice. It consists of removing the blisters, sanitizing the affected laminate, allowing the area to dry completely, then rebuilding the gelcoat and applying a protective barrier. This type of intervention can be carried out by a DIY owner with the right products and a little patience. However, for extensive or deep osmosis, professional treatment is absolutely necessary.
The complete professional treatment of osmosis, also called “peeling”, represents a major intervention that requires specialized equipment and advanced technical know-how. The standard procedure begins with the complete stripping of the gelcoat and some of the laminate on all affected areas, usually by sandblasting or hydrogumming. This operation exposes the laminate to the bare surface and eliminates all contaminated resin. The shell is then thoroughly rinsed in fresh water to remove acid residues, then it must dry completely, which can take several weeks or even several months depending on weather conditions and the thickness of the water infiltrated.
Once the shell is completely dry, which is verified by humidity measurements, the professional applies several coats of a special anti-osmosis epoxy primer that waterproofs the laminate and creates a waterproof barrier. This primer penetrates into the pores of the laminate and forms a protective shield that prevents any new water infiltration. Several layers of gelcoat or epoxy paint are then applied to reconstitute the outer surface of the shell. The whole process can take several months and represents a significant cost, often several thousand euros depending on the size of the boat and the extent of the damage.
Of course, prevention is still preferable and much less expensive than curative treatment. Several preventive measures significantly reduce the risks of osmosis. Applying an anti-osmosis barrier treatment to a new or healthy boat is a wise investment. These special epoxy products create an impermeable layer that protects the laminate from water ingress. Applied to a healthy and well-prepared case, they provide effective protection for many years. Some shipyards now offer this application as an option on new boats.
Regular drying of the shell is a very effective preventive measure that is often overlooked. A boat that stays afloat constantly keeps its gelcoat permanently saturated with water, which encourages infiltration. If you can take your boat out regularly, even a few days a month, you will allow the gelcoat to dry and drastically reduce the risk of osmosis. Owners who winter their boat ashore naturally benefit from this protection for several months each year. Even during the sailing season, try to take your boat out periodically if port facilities allow.
Importance of storage and ventilation
The storage conditions of your boat directly influence the risks of osmosis and affect the general health of the gelcoat and laminate. Improper storage can create a favorable environment for the development of osmosis and other humidity problems, while proper storage effectively protects your investment. Ventilation is the key to good storage, as it allows moisture to escape and prevents condensation.
When your boat is stored ashore, whether on a trailer, on a boat, or in a shed, make sure it is positioned at a slight angle backwards to facilitate the flow of water that may accumulate in the cockpit or on the deck. Remove all drain plugs to allow the evacuation of water that may stagnate in the bottom of the boat. Open some hatches and hoods slightly to encourage air flow inside, but protect these openings with anti-intrusion grills or foams to prevent animals from getting on board.
The protective cover should be chosen carefully. It is imperative to choose a breathable material that allows water vapor to pass through while protecting against bad weather. Waterproof plastic sheeting should be avoided because they trap humidity and create a particularly harmful greenhouse effect. Install the cover with enough space under it to allow air flow. Arches or supports keep the cover away from the deck and prevent the formation of water pockets. Secure the cover securely to prevent it from blowing in the wind, as this repeated friction would abrade the gelcoat.
Dry port storage is an excellent option for boats that do not sail daily. These installations keep the boat out of the water between exits, which drastically limits exposure to humidity and reduces the risk of osmosis. The boat is launched only when you want to sail, then taken out and stored dry after use. This alternation of periods of immersion and drying keeps the gelcoat in optimal condition. In addition, dry port storage protects your boat from fouling and eliminates the need to apply antifouling, which represents a significant saving.
Storage in a closed shed offers the best possible protection, especially in areas where winters are severe. A shed protects against bad weather, frost, UV and allows optimal ventilation control. However, be careful not to create an environment that is too confined. Even in a shed, maintain minimal ventilation to avoid condensation. Some owners install electric dehumidifiers on board during wintering, which maintains optimal humidity levels and protects gelcoat as well as electronic equipment and interior furnishings.
Regardless of the storage method chosen, make regular visits to check the condition of your boat. After heavy rain, check that no water is stagnant on the deck or in the cockpit. Check the condition of the cover and ventilation devices. These visits allow you to quickly identify any emerging issues and address them before they get worse. A connected monitoring system such as the Oria Marine IoT box can alert you in the event of an anomaly detected on board, such as an abnormal rise in humidity levels or water intrusion into the seabed, allowing you to intervene quickly even when you are not physically present at the port.
Maintenance of living works
The living works of your boat, these parts submerged permanently or regularly, are subject to particular constraints and require specific maintenance. Living in an aggressive marine environment, they are exposed to corrosion, biological fouling, mechanical shocks and erosion. Rigorous maintenance of these areas guarantees the navigation performance of your boat, protects the propulsion and steering components, and prevents costly damage.
Fouling, that is to say the colonization of the hull by marine organisms such as algae, shells and barnacles, represents the main problem of living works. These organisms cling to the submerged surface and proliferate rapidly, creating a rough layer that increases the resistance to movement and can significantly decrease the speed of the boat while increasing fuel consumption. In addition, some organisms such as tarts can even puncture and damage gelcoat and laminate. Fouling prevention is therefore an absolute priority.
Antifouling application: types, frequency, method
Antifouling is a special paint that contains biocides that prevent marine organisms from attaching and growing on the hull. Choosing and applying appropriate antifouling are among the essential tasks of annual maintenance for any boat that is kept in water. Several types of antifouling exist, each adapted to specific conditions of use.
Self-polishing antifoulings, also called erodible, gradually release their biocides through a controlled erosion mechanism. In contact with water, the paint surface dissolves slowly, permanently exposing a fresh layer of biocides. These antifoulings are particularly suitable for boats that sail regularly because movement in the water promotes uniform erosion of the surface. Their duration of effectiveness generally varies from twelve to twenty-four months depending on the quality of the product and the intensity of the local fouling.
Hard matrix antifoulings form a rigid film that releases biocides by diffusion through the pores of the matrix. They wear very little and can last for several seasons, making them economical in the long run. They are well suited to fast boats because their hard surface is more resistant to erosion caused by speed. Their disadvantage is that they build up layers over successive applications, which requires thorough stripping every three to five years to avoid excessive paint accumulation.
Hybrid antifoulings combine the advantages of the two previous types. They offer good durability while gradually eroding to maintain their effectiveness. They are often the best compromise for boaters who sail moderately. More recently, ecological antifoulings without metallic biocides have appeared. Based on alternative technologies such as silicones or natural repellents, they appeal to environmentally conscious boaters, although their effectiveness is generally lower in highly colonized waters.
The frequency of application depends on the type of antifouling used and the local conditions. In warm tropical waters where fouling is particularly aggressive, annual renewal is required even with the best products. In colder waters or waters that are less rich in nutrients, quality antifouling can remain effective for two seasons. Observe the condition of your shell regularly: as soon as you notice the appearance of algae or small shells despite antifouling, it is because it is reaching the end of its life and will have to be renewed soon.
The application of antifouling requires careful preparation to ensure its effectiveness and durability. Start by taking your boat out of the water and cleaning the living things thoroughly with a pressure washer to remove any marine organisms, algae, and accumulated dirt. Allow the case to dry completely. If the old antifouling is in good condition and compatible with the new product you are going to apply, a simple light sanding to create an attachment surface is sufficient. Otherwise, or if several layers of incompatible antifoulings have accumulated, a complete stripping is required.
Pickling can be done mechanically by sanding or scraping, or chemically with specific strippers. Mechanical stripping generates toxic dust containing biocides: it is imperative to wear a suitable protective mask, glasses and gloves. Work in a well-ventilated area and collect all residues for disposal in accordance with regulations as they are hazardous waste. Chemical strippers are less dusty but also require strict precautions for use.
Once the surface is prepared, apply the bonding primer if necessary, then apply the antifouling layers according to the manufacturer's recommendations. Most antifoulings require two to three coats for optimal protection. Carefully respect the time between coats and the drying times before putting them in the water, which vary depending on the product. Apply antifouling with a roller by crossing the passes to obtain an even thickness. A brush will be required for hard-to-reach areas such as the turn of the propeller, the rudder or the recesses. Mark the date of application and the product used on a notebook to facilitate the follow-up of the maintenance.
Inspecting the propeller, shaft, and sacrificial anodes
The propeller is the propulsion unit of your boat and deserves particular attention during each trip out of the water. A damaged or clogged propeller significantly degrades performance and increases fuel consumption. Carefully examine each blade for deformations, bumps, chips, or cracks. Run your hand over the leading edge of each blade: it should be smooth and even. Impacts with floating objects or the bottom create cuts or deformations that disrupt water flow and create vibrations.
Propeller blades can accumulate calcareous deposits, shells, or algae that reduce their effectiveness. Clean the propeller with a wire brush and a degreaser to remove all these deposits. Also, check that the propeller rotates freely on its axis without a hard spot or jamming. A point of resistance could indicate a rolling problem or a stuck foreign object. For folding or swivel propellers, check the folding mechanism and grease the joints according to the manufacturer's recommendations.
The propeller shaft transmits power from the engine to the propeller and must remain perfectly aligned and in good condition. Visually inspect the tree over its entire visible length for signs of corrosion, deep scratches, or deformations. Turn the shaft by hand: it should rotate smoothly and without excessive bearing play. High clearance indicates bearing wear that requires replacement. Shaft seals, called cable glands for traditional systems or PSS seals for modern systems, should be checked and maintained regularly. A traditional cable gland must allow a few drops of water to pass through per minute as the shaft rotates to ensure lubrication. A PSS joint must remain completely watertight.
Sacrificial anodes play a crucial role in protecting your submerged metal elements against galvanic corrosion. These zinc, aluminum or magnesium parts are designed to corrode in place of the more noble metal parts such as the bronze propeller, the shaft, the rudder or the engine bases. Inspect all anodes at each water outlet. An anode must be replaced when it is consumed at more than fifty percent of its original volume. If your anodes burn out very quickly, this may indicate an electrical leak current problem on board that requires investigation.
Check that the anodes are in direct metallic contact with the parts they protect. If antifouling paint covers the anode or its contact surface, it will not be able to play its protective role. When applying antifouling, protect the anodes with tape to avoid painting them. Some boaters prefer to apply a thin layer of grease to anodes to improve their effectiveness, but this practice is controversial because it can also delay the activation of the anode. Follow the recommendations of your boat manufacturer regarding the positioning and number of anodes required.
Preparation before going into the water
Preparing your boat before launching is a crucial step that determines the success of your sailing season. This phase verifies that all systems are working properly and that the shell is ready to return to its natural element. A methodical checklist will avoid unpleasant surprises and premature returns to the construction site.
Start by checking that the antifouling has had time to dry according to the manufacturer's specifications. Premature entry into the water can leach out antifouling before it has formed an effective protective film, which would compromise its effectiveness for the entire season. Some antifoulings tolerate being put in the water after only a few hours, others require several days. When in doubt, always refer to the instructions for the product used.
Visually inspect all living works one last time for areas that were forgotten when antifouling was applied or for damage that may have occurred during storage. Pay particular attention to the areas around the pass-hulls, rudder, propeller and water outlets. Make sure all anodes are in place and in good condition. Check that the shell valves are free and functioning properly: open and close them several times to make sure they are not seized.
Remove any drain plugs that you left open during storage and put them back in place with their seals. Check the condition of these seals and replace them if they are hardened or cracked. This check is absolutely critical because a poorly put on plug or a faulty joint can cause a major waterway once the boat is in the water. Some boaters attach drain plugs to the boat with a cord to never misplace them, an excellent precaution.
Check that the cable stays, dormant and running rigs are in good condition if your boat is a sailboat. Check the tension of the cable stays and the condition of the turnbuckles and pins. Inspect the sails you took out for the season for wear and tear. Test all electrical and electronic equipment: bilge pumps, navigation lights, instruments, autopilot. Check engine oil, coolant, and hydraulic fluid levels if your boat has hydraulic equipment.
Before the actual launch, take a few last photos of your boat out of the water, especially the vivid works. These photos will serve as a reference to observe the evolution of the condition of the hull over the seasons and may be useful in the event of a claim for insurance procedures. Once all these checks have been carried out, your boat is ready to return to the water for a new sailing season in all serenity.
Seasonal maintenance: annual checklists
The maintenance of a fibreglass boat follows a seasonal cycle punctuated by periods of intensive use and phases of rest. This approach, organized into two main stages - the beginning and the end of the season - allows you to keep your boat in optimal condition while anticipating maintenance needs before they become problems. Seasonal checklists are valuable tools to not forget anything and to ensure that your boat remains safe and efficient year after year.
Seasonal maintenance is not limited to technical and mechanical aspects. It also includes the verification of safety equipment, the updating of flight documents, the control of insurance and the planning of larger works that may be necessary. This global vision turns seasonal maintenance into a privileged moment to reconnect with your boat, where you take the time to assess its general condition and plan for possible improvements.
Early season maintenance
Spring marks the awakening of your boat after the winter months. It is time to prepare your boat meticulously so that it is ready to sail safely from the first sunny days. Early season maintenance is similar to a complete return to service that generally requires several days of work, depending on the size of your boat and the extent of the tasks to be carried out.
Start by removing the protective cover and doing a thorough cleaning of the entire boat. Remove any dirt that has accumulated during the winter, clean exterior and interior surfaces, and wash cushions and linens. Ventilate the interior widely to remove humidity and musty odors. This thorough cleaning will also allow you to identify any damage that occurred during wintering, such as water infiltration, mold or frost damage.
Inspect the hull and deck thoroughly using the methodology described in the previous sections. Look for new cracks, areas of oxidation, damage to the gelcoat. If you notice problems, now is the perfect time to do repairs before you launch. Check the condition of the seals around the portholes, hoods, chain loops, and hatches. Replace any joints that show signs of hardening, cracking, or loss of elasticity.
Check all mechanical and electrical systems. Change the engine and replace oil, fuel, and air filters according to the manufacturer's recommendations. Check the engine belts and their tension, check the coolant level and replace it if necessary. Test bilge pumps, fresh water pumps, marine toilets, and all hydraulic equipment. Recharge or replace batteries that may have lost capacity during wintering.
Safety equipment needs to be checked and updated. Check the expiration dates of flares, location beacons, and life rafts. Check that the life jackets are in good condition, that their inflation systems are working, and that the CO2 cartridges are not pierced. Test the fire extinguisher and check its pressure. Check that the first aid kit is complete and that the medications have not expired. These checks may seem tedious but they are essential for your safety at sea.
If your boat needs to be launched, now is the time to apply or renew antifouling according to the procedures described above. Also take advantage of this water outlet to carry out all maintenance operations that require access to living works. Once all these tasks have been completed and after a final general inspection, your boat is ready for a new sailing season. Take a test drive to check that all systems are working properly before setting off on your first cruise of the season.
End-of-season maintenance before wintering
Fall heralds the end of the boating season and the time to prepare your boat for wintering. This maintenance phase is just as important as that of spring because it determines the condition in which you will find your boat the following season. Improperly prepared wintering can cause significant damage, especially in areas where temperatures drop below freezing.
The first step is to clean the entire boat thoroughly, both inside and out. A dirty boat left for the winter will develop molds, odors and see its surfaces degrade more quickly. Wash the hull, deck and superstructures with a good marine shampoo. Clean the interior thoroughly by vacuuming every nook and cranny where crumbs or food residues could attract rodents. Wash and dry all cushions, linens, and textile equipment before storing them in waterproof bags or taking them home.
The complete dehydration of the water circuit is a crucial operation in regions where frost threatens. Water that is left in the pipes, pumps, and reservoir can freeze and cause catastrophic cracks. Drain the fresh water tank completely and turn on all faucets to let the water drain out. Use compressed air to remove residual water from the pipes if possible. Pour some non-toxic antifreeze into the pipes, tank, and marine toilets to protect this equipment from freezing. Remember to also drain the water heater if your boat is equipped with one.
The engine requires specific preparation for wintering. Do a final oil change as used oil contains acids that can corrode metal parts during months of inactivity. Replace the oil filter. Fill the fuel tank completely and add a fuel stabilizer to prevent fuel degradation. A full tank limits the formation of condensation that could cause water to enter the fuel system. Run the engine for a few minutes to allow stabilized fuel to circulate throughout the system. Lubricate all lubrication points according to the recommendations in the maintenance manual.
Protect metal parts against corrosion by spraying an anti-corrosion product or by applying a thin layer of grease to exposed parts. Unplug the batteries and take them home where you will keep them in a dry place at a moderate temperature. Fully recharge them before storage and do a maintenance recharge every two months during the winter. Lithium batteries require less maintenance but should also be stored at an appropriate charge level according to the manufacturer's recommendations.
Remove all valuable electronic equipment and take it home where it will be safe from humidity, frost, and theft. This includes card readers, handheld VHFs, sextants, binoculars, and other sensitive or expensive equipment. Also remove any valuables, important trip papers, insurance documents, and spare keys. Leave the inside of the boat open and ventilated by positioning moisture absorbers in various compartments. These absorbers will limit condensation and prevent the appearance of mold.
Install the protective cover, making sure it is well ventilated and securely attached. Check your boat regularly during the winter, ideally at least once a month. These visits allow you to check that the cover has not moved, that no water has occurred, that the moisture absorbers are doing their job and that no harmful animals have settled on board. Take advantage of these visits to plan the maintenance or improvement work that you will carry out during the winter or the following spring.
Boat storage: trailer, dry port, hangar
The choice of how to store your boat during the off-season considerably influences its state of conservation and maintenance costs. Each solution has advantages and disadvantages that should be evaluated based on your personal situation, budget and opportunities in your region.
Trailer storage is the most economical and practical solution for small boats up to about seven meters in size. This option gives you a lot of freedom because you can keep your boat at home, in your garden, driveway, or garage. You thus have permanent access to your boat to carry out maintenance work at your own pace. Make sure that the trailer is in good condition, that the tires are properly inflated, and that the braking system is working. The boat must rest on appropriate supports that distribute the weight well without creating excessive stress points on the hull. Securely secure the trailer wheels to prevent displacement.
Dry port storage is ideal for medium-sized boats, generally between six and twelve meters. These modern installations keep your boat out of the water in a secure environment. The dry port offers several significant advantages: optimal protection against bad weather, absence of fouling and therefore no need for antifouling, reinforced security against theft and vandalism, and often launch services on demand that allow you to navigate without worrying about handling constraints. The costs are generally higher than trailer storage but still lower than those of permanent anchoring or storage in a private hangar.
Storage on board ashore in a shipyard or collective storage area represents an intermediate solution. Your boat is placed on a boat specially designed to support its weight in a balanced way. This solution is suitable for boats of all sizes and generally offers good value for money. Access to your boat may be restricted according to shipyard rules, and you may need to coordinate your visits with opening hours. Choose a location away from the prevailing winds if possible, as excessive exposure to wind accelerates the aging of the gelcoat and damages the protective cover.
Closed hangar storage is the premium solution that offers the best possible protection. Your boat is protected from bad weather, UV, frost and sudden thermal variations. This optimal protection considerably slows down the aging of gelcoat and equipment. The shed also makes maintenance work easier during the winter because you can work under cover regardless of weather conditions. Costs are generally high and availability limited, especially in areas where yachting is highly developed. Some boaters come together to rent or build a collective hangar, which makes it possible to pool costs.
Whatever the solution chosen, a few fundamental principles apply universally. The boat must be positioned in a stable and balanced manner to avoid hull deformations under its own weight. Support points must be numerous and distributed over areas of strong structure, never on thin panels that could deform. The keel must be properly supported, and lateral supports prevent tipping. For sailboats, the mast can remain in place or be removed depending on local conditions and your personal preferences.
Common mistakes to avoid
Maintaining a fiberglass boat, while relatively accessible, involves pitfalls that even experienced boaters regularly fall into. These mistakes, often made with the best of intentions, can cause lasting damage to the gelcoat, compromise structural integrity, or simply create more work than they solve. Knowing these common mistakes will allow you to avoid them and maintain your boat in a really effective way.
The main source of problems is the temptation to take shortcuts or to use unsuitable products for reasons of economy or lack of information. Gelcoat is a relatively delicate material that requires appropriate products and techniques. What works on a domestic surface is not necessarily suitable for your boat. Likewise, the “more powerful the better” approach is generally counterproductive and harmful.
Use of abrasive or unsuitable products
The most common mistake is using household cleaning products over gelcoat. Household detergents, bleach, multi-purpose cleaners, or bathroom products often contain aggressive chemical agents that attack, tarnish, or weaken the gelcoat. Bleach, in particular, is absolutely forbidden because it discolors the gelcoat irreversibly and degrades joints and textiles. Only use products specifically formulated for the marine environment that respect the specificities of gelcoat.
Abrasive sponges, iron straws, and wire brushes are another common source of damage. These tools, used to get rid of stubborn stains, deeply scratch the gelcoat and create micro-furrows that permanently tarnish the surface and promote the subsequent attachment of dirt. Even the “scratchy” sides of household sponges are too abrasive for gelcoat. Always choose sponges with large soft cells, microfiber cloths or soft-bristled brushes specially designed for marine use.
Using car waxes is a common mistake. Although these products seem similar to marine waxes, their formulation is not adapted to the marine environment. Automotive waxes generally do not withstand constant contact with salt water and degrade quickly, leaving whitish traces that are difficult to remove. In addition, some car waxes contain silicones that become embedded in the gelcoat and compromise the adhesion of future treatments such as antifoulings. Invest in quality marine products that are specifically formulated to resist the aggressions of the marine environment.
The use of acetone or powerful solvents to clean the gelcoat is a particularly harmful error. These products dissolve not only dirt but also the surface of the gelcoat itself, creating dull and fragile areas. Acetone has a place in the maintenance of a boat, but only for specific operations such as degreasing before repair or preparing surfaces to be glued. For routine cleaning, it is much too aggressive. Likewise, cellulose thinners, white spirit and other solvents have no place in the regular cleaning of the gelcoat.
Applying nail polish to quickly mask small scratches is a tempting but problematic makeshift solution. Nail polish does not stick permanently to the gelcoat, changes color over time, and creates an unsightly repair that will be more difficult to correct later. Always use an appropriate repair gel coat, even for the smallest touch-ups. Investing in a few tubes of gelcoat of the right color will prove to be infinitely more satisfying than these makeshift solutions.
Neglect the small cracks in the gelcoat
A particularly common and damaging mistake is to ignore the small cracks in the gelcoat under the pretext that they seem superficial and harmless. This neglect can have serious consequences in the long run because even the seemingly minor cracks are entry doors for water that will gradually seep into the laminate.
Microcracks, those thin, barely visible lines that often appear in the shape of a spider web, are usually the first to be overlooked. Homeowners say they will fix them “later” or “when they have time.” During this time, water seeps in at each sea exit, penetrates into the laminate and starts a degradation process that can lead to osmosis or local delamination. A few minutes invested in repairing these microcracks as soon as they appear will save you hours of work and considerable costs later.
Some boaters mask cracks with wax or polish thinking they are treating the problem. This approach only temporarily disguises the defect without correcting it. The wax fills the crack superficially and makes it less visible, but it is not an effective barrier against water ingress. Under the effect of thermal variations, mechanical stress and washing, the wax will disappear quickly and the crack will reappear, having probably had time to worsen in the meantime.
The opposite error is treating a major structural crack as a simple cosmetic defect. Not all cracks are the same. A superficial microcrack in gelcoat does not have the same severity level as a deep crack that extends into the laminate or a crack located in a structural stress zone such as the pont-shell junction or near keel attachments. If you find that a crack is deep, is widening rapidly, or is in a critical area, seek professional advice rather than trying to treat it yourself.
Lack of follow-up is also a problem. Some cracks, even when repaired, can reappear if the underlying problem has not been treated. A crack that consistently returns to the same location generally indicates excessive stress at that location, perhaps due to a structural problem, an overly tight fit, or a weak point in construction. In these cases, the solution is not to repair the same crack indefinitely but to identify and correct the root cause. Document the repairs you are doing and monitor the evolution of problem areas. If a crack reappears after repair, it is a warning sign that deserves further investigation.
Clean in the sun or with tools that are too powerful
The mistake of cleaning your boat in full sun or in very hot weather is extremely common, especially among novice boaters who take advantage of a nice sunny day to take care of their boat. However, this practice causes numerous problems. The sun's heat causes water and cleaning products to evaporate quickly and dry out before you even have time to rinse them off. These dried residues leave whitish marks or halos that are very difficult to remove later.
In addition, cleaning products can react differently under the effect of heat, sometimes becoming more aggressive than they would be at room temperature. The gelcoat itself, when hot, becomes slightly softer and more vulnerable to scratches. Polishing on hot gelcoat also has risks because friction generates even more heat, which can create areas of localized overheating that tarnish or deform the gelcoat. Always work in the shade, early morning or late afternoon, or on an overcast day. This simple precaution will make your work much easier and give much better results.
Another common source of problems is using a pressure washer. These powerful tools seem perfect for quickly cleaning a boat, and they are in fact perfect if used properly. But the temptation to increase the pressure or move the nozzle closer together to get rid of stubborn dirt can cause considerable damage. Excessive pressure or a nozzle that is too close can literally tear off gelcoat, create deep scratches, peel off seals, force water into gaps and behind fittings.
Always keep the spray at a distance of at least fifty centimeters from the surface and use moderate pressure, generally no more than one hundred to one hundred twenty bars for routine gelcoat cleaning. Never direct the jet directly onto joints, junction areas, openings, electrical equipment, or areas where the gelcoat is already damaged. For heavily soiled anti-slip surfaces that require vigorous cleaning, increase the pressure slightly but always keep a safe distance. Moreover, high-pressure cleaning should never be your main method: prefer careful manual cleaning and use high-pressure cleaning only for final rinsing or occasional cleaning.
Using a rotary polisher without previous experience represents a significant risk. These powerful machines can turn polishing a boat from several hours of manual labor into a few hours of mechanical work, but they can also cause irreparable damage if misused. A poorly controlled rotary polisher can create holograms (circular traces), burn the gelcoat in the corners and on the edges, or remove too much material and pierce the gelcoat all the way to the laminate. If you're new to mechanical polishing, start with a random orbital polisher that's much more tolerant of handling errors.
The use of power tools near water or on a wet boat obviously presents electrical risks. Always make sure that your electrical installation is protected by a residual current circuit breaker and that your hands and the boat are dry when using power tools. Never work with damaged extensions or tools. Safety should always take precedence over efficiency or speed of work.
Tips for extending the life of a fibreglass boat
A properly maintained fiberglass boat can last for several decades while maintaining excellent performance and a beautiful aesthetic appearance. However, the exceptional longevity of this material does not require regular and appropriate maintenance. By following a few fundamental principles and adopting best practices, you will maximize the life of your boat while maintaining its heritage value.
The preventive approach is undoubtedly the most effective and the most economical strategy. It's always better - and less expensive - to prevent a problem from happening than to have to fix it once it has occurred. This preventive maintenance philosophy applies to every aspect of your boat, from gelcoat to mechanical systems to electronic equipment.
Frequency of recommended care
Establishing a consistent maintenance schedule is the key to keeping your boat in optimal condition without getting overwhelmed. This calendar should distinguish between daily, weekly, monthly, seasonal, and annual tasks. This systematic organization turns the interview into a series of simple actions rather than an intimidating mountain of work.
Daily care or after each outing is limited to a few simple but essential actions. Rinse your boat with fresh water to remove salt, wipe down horizontal surfaces that hold water, check for new scratches or damage, and quickly check bilge pumps and water levels in the bottoms. Those few minutes invested after each navigation make a huge difference in the long run.
Weekly maintenance, during the active sailing season, should include more thorough cleaning with a suitable shampoo, rapid polishing of stainless steel and chrome parts, checking ropes and sails for incipient wear and tear, and checking the proper functioning of all safety equipment. These tasks generally take one to two hours and allow potential problems to be detected early.
The monthly maintenance deepens these checks. Visually inspect the entire hull and deck for new cracks or areas of oxidation. Check the condition of seals and sealants. Check that all pumps, valves, and shell passages are working properly. Test navigation and communication systems. Check engine oil and various fluid levels. Grease winches and other moving mechanisms. This monthly inspection is your best defense against minor problems getting worse.
Seasonal interventions, detailed in the previous sections, prepare your boat for seasonal changes. Returning to service in spring and preparing for winter in autumn are the two highlights of the year when you will be doing the heaviest maintenance operations. Plan these interventions in advance and set aside enough time to complete them without haste.
Some operations require a multi-year intervention frequency. The complete polishing of the boat can take two to three years if you maintain your gelcoat well by regular cleaning and the application of protective waxes. Replacing anodes depends on their consumption speed, which varies according to the electrical environment of your boat. Major engine overhauls generally follow the manufacturer's recommendations, based on operating hours or a time interval.
High-performance and eco-friendly products
The choice of cleaning products directly influences the effectiveness of your maintenance but also its environmental impact. The growing ecological awareness is pushing many manufacturers to develop marine products that are more environmentally friendly, and it is now possible to reconcile performance and ecological responsibility in the maintenance of your boat.
Biodegradable shampoos and detergents are the first step towards more ecological maintenance. These products decompose naturally in the marine environment without leaving toxic residues that accumulate in ecosystems. Look for recognized environmental certifications that ensure that products actually meet strict biodegradability standards. The modern formulations of these biodegradable shampoos no longer have anything to envy to traditional products in terms of effectiveness, they clean just as effectively without compromising the health of aquatic environments.
Ecological waxes and sealants represent an interesting evolution in the field of gelcoat protection. Some manufacturers now offer waxes based on natural components or biodegradable polymers that offer protection comparable to traditional synthetic products. These products avoid persistent substances that can accumulate in the environment. Although sometimes slightly less durable than their synthetic counterparts, they are an excellent compromise for boaters concerned about their ecological footprint.
Ecological antifoulings deserve particular attention because traditional antifoulings based on metallic biocides such as copper represent an important source of marine pollution. The new generations of antifoulings without heavy metals use alternative technologies such as ultra-smooth silicones that mechanically prevent organisms from sticking, or repellents of natural origin. These products work especially well on boats that sail regularly, as movement makes it easier for organisms that are trying to take hold. For boats that stay still for a long time, their effectiveness is still lower than that of traditional antifoulings, but the formulations are constantly improving.
Cleaning products based on natural ingredients such as white vinegar, baking soda or vegetable soaps can be an effective substitute for certain chemicals for specific tasks. Diluted white vinegar is an excellent descaler for stainless steel surfaces and windows, baking soda forms a mildly abrasive paste ideal for treating stubborn stains, and vegetable soaps effectively clean many surfaces. These natural alternatives generally cost less than specialized products and pose no danger to the marine environment.
The sparing use of products, regardless of their nature, is in itself an ecological approach. Strictly follow the dosages recommended by the manufacturers because using more product does not clean better, it simply generates more pollution and waste. Regular cleaning with mild products requires fewer products and effort than occasional cleaning of encrusted dirt with powerful products. This preventive approach is therefore at the same time more effective, more economical and more ecological.
The choice of cleaning tools and accessories also influences your environmental impact. Reusable microfiber cloths are an excellent substitute for disposable sponges and paper towels. They are machine washable and last for several years, eliminating waste production. Brushes with wooden handles and natural bristles are a sustainable alternative to plastic brushes. When replacing your maintenance equipment, always consider choosing durable and repairable options over disposable products.
When to call in a professional
Recognizing the limits of your skills and calling in a professional at the right time is a form of wisdom that will often save you from costly mistakes. Some interventions require specialized technical know-how, professional tools, or simply experience that you have not yet acquired. Identifying these situations and seeking the help of an expert is a wise investment rather than a superfluous expense.
Structural problems in the shell almost always require the intervention of a qualified professional. If you see soft or soft areas in the deck or hull that indicate delamination, significant cracks in areas of structural stress, or extensive damage following an impact or grounding, consult a boat-building expert. These professionals have the knowledge and equipment needed to assess the extent of the damage, determine if the structure is maintaining its strength, and make the appropriate repairs that will ensure the safety of your boat. Attempting to repair structural damage yourself without the required skills can seriously compromise the integrity of your boat.
Complete osmosis treatment is another procedure that is generally beyond the capabilities of an amateur boater. Although you can treat a few isolated blisters yourself, extensive osmosis requires professional stripping, controlled drying that can take several months, and the application of epoxy barrier systems according to specific protocols. Professionals have equipment such as professional moisture meters, forced drying facilities, and experience that allows them to properly assess when the shell is dry enough to receive treatment. This expertise makes all the difference between a successful treatment that will protect your boat for years to come and a costly failure that will require a complete recovery.
Complex gelcoat repairs, especially on visible surfaces where the aesthetic result counts, often benefit from the intervention of a professional. If you need to repair a large damaged area, completely rebuild an area where the gelcoat has disappeared, or perform a repair that must be completely invisible, the expertise of a gelcoat specialist will make a significant difference. These artisans master color matching techniques, know the best methods for applying and finishing, and get results you'd be hard-pressed to match without their experience.
Interventions on propulsion and steering systems sometimes require specialized skills. Replacing keel bolts, for example, is a critical operation that involves your safety at sea and should always be carried out by a qualified professional. Likewise, interventions on rudder systems that involve the dismantling of the rudder shaft or the replacement of bearings require specific know-how and appropriate tools. Major engine overhauls, especially on modern engines equipped with sophisticated electronics, are best done by calling on a specialized mechanic who has the necessary diagnostic equipment and technical knowledge.
Professional expertise is also valuable for complex diagnoses. If you notice a recurring problem that you cannot identify, if your boat has unusual symptoms, or if you simply want to have a complete assessment of the condition of your boat, calling in an expert can save you a lot of time and money. These professionals have a keen eye for identifying emerging issues that you may be missing, and they can advise you on the best maintenance priorities and investments for your boat.
Finally, some particularly time-consuming or physically demanding tasks deserve to be delegated if your time is limited or if you do not have the necessary physical capacities. The complete polishing of a large boat represents dozens of hours of physically demanding work. If you do not have this time or if your physical condition does not allow it, hiring a professional will allow you to obtain an impeccable result without exhausting yourself. Think of this expense as an investment in the preservation of your boat and in your ability to continue to enjoy boating rather than wearing yourself out in exhausting maintenance work.
FAQ: frequently asked questions about fiberglass boat maintenance
Fibreglass boat owners often have the same questions about maintaining their boats. This section answers the most common questions by providing clear and practical answers that will help you make the right decisions for maintaining your boat.
What is the ideal frequency to polish a fiberglass boat?
The ideal frequency of polishing depends mainly on the exposure of your boat to the elements and the quality of its routine maintenance. A boat that is constantly in the water in a tropical climate with high sun exposure will probably require annual polishing to maintain the shine of the gelcoat. Conversely, a boat that is wintered several months a year in a temperate region and regularly protected by a cover can be satisfied with polishing every two to three years.
Observing the condition of the gelcoat will guide you better than a rigid calendar. When you notice a general loss of shine, a slightly chalky appearance, or the appearance of micro-scratches visible under low lighting, it's time to consider polishing. Between complete polishes, the regular application of a good protective marine wax extends the shine of the gelcoat and eliminates the need for polishing. This preventive approach is more effective than waiting for the gelcoat to be highly oxidized before intervening.
What products should I use to clean a gelcoat without damaging it?
Cleaning gelcoat requires products specifically formulated for the marine environment that respect the delicate nature of this material. Only use a neutral pH boat shampoo, never use household detergents, bleach or multi-purpose products that contain too aggressive agents. Marine shampoos are designed to effectively clean salt, organic deposits, and dirt without attacking the gelcoat.
For the application, choose a sponge with large soft cells or a microfiber cloth, never abrasive sponges, iron straws or metal brushes that would irreparably scratch the surface. Dilute the shampoo according to the manufacturer's recommendations in lukewarm water, apply in circular movements without excessive pressure, then rinse thoroughly with clean water. This gentle but regular cleaning keeps your gelcoat in excellent condition without prematurely wearing it out.
For stubborn stains, use specialized products adapted to the type of stain concerned. Oil stains respond well to marine degreasers, calcareous deposits dissolve with specific descalers, and traces of rust are removed with anti-rust removers formulated to not attack the surrounding gelcoat. Always test these products on a small, inconspicuous area before applying them to large areas.
How to recognize the onset of osmosis?
The onset of osmosis is generally manifested by the appearance of small blisters or blisters under the gelcoat, mainly in permanently submerged areas, therefore below the waterline. These blisters vary in size, from a few millimeters to one or two centimeters in diameter, and look like small bubbles trapped under the surface. You will detect them more easily by touch than by sight, by running your hand over the shell you will feel these slight protuberances.
If you pierce a suspicious blister with a fine needle, a liquid will flow out, which is usually brownish in color and has a characteristic sour odor reminiscent of vinegar. This distinctive odor results from the chemical degradation of the resin by hydrolysis. The presence of this acidic liquid confirms that it is indeed osmosis and not a simple cosmetic defect in the gelcoat.
Another early sign of osmosis involves changes in sound when you tap the shell. An affected area will sound different than a healthy one, with a duller or duller sound, because water ingress changes the acoustic properties of the laminate. Professional moisture meters can detect osmosis at an even earlier stage by measuring the humidity level in the laminate even before visible blisters appear. If you suspect the onset of osmosis, consult a professional quickly for an accurate diagnosis and appropriate treatment.
Is antifouling mandatory for all boats?
Antifouling is not legally mandatory in most jurisdictions, but it is becoming virtually indispensable for any boat that stays in the water for an extended period of time. Without antifouling, marine organisms rapidly colonize the submerged hull, creating a fouling layer that significantly degrades navigation performance, increases fuel consumption, and can even damage the gelcoat.
Some types of boats can do without antifouling. Boats taken out of the water after each use, such as those kept on a trailer or in dry port, generally do not need them because the hull dries between exits, which prevents organisms from establishing themselves permanently. Moreover, this solution has the advantage of avoiding the use of biocides while maintaining a perfectly clean shell. Boats in cold fresh water can also do without it more easily because fouling develops less quickly there than in hot salt water.
On the other hand, if you keep your boat afloat all times, especially in warm waters rich in nutrients where fouling proliferates, antifouling becomes almost essential. The time and money invested in its application are largely recovered in preserved navigation performance, fuel savings, and ease of maintenance. Some ports or shipping areas also require the use of specific antifoulings, often ecological formulations without heavy metals, find out about local regulations before choosing your product.
How do you remove the yellow marks on the case?
The yellow traces on the shell generally come from several different sources that require appropriate treatments. The uniform yellowing of white gelcoat results from oxidation and prolonged exposure to UV. This type of yellowing is treated by gradual polishing which removes the oxidized surface layer and reveals the white gelcoat still intact underneath. Start with a medium compound, continue with a fine polish, and finish with a shine to regain the original whiteness.
Localized yellow drips, often located under bridge joints, hilories, or fasteners, generally come from the degradation of sealants and joints that release organic compounds. A powerful degreasing cleaner or a specific anti-drip product generally eliminates these traces. Apply the product, leave it on for a few minutes, scrub with a non-abrasive sponge, then rinse thoroughly. If drips reappear quickly, identify and replace the faulty seal that caused them to permanently fix the problem.
Circular or irregular yellow spots can come from organic residues, chemical reactions with certain products, or dye transfers from tusks, ropes or objects placed on the shell. These spots sometimes require several successive treatments to disappear completely. Try a mild cleanser first, then a stronger stain remover if necessary, and lastly spot polishing. Prevention remains the best approach by immediately rinsing off any suspicious substance and avoiding prolonged contact between the gelcoat and materials that may stain it.
Do you have to wax your boat every year?
The annual application of wax is indeed a good practice for the majority of boats, but the optimal frequency depends on several factors. Traditional marine waxes offer limited protection over time, generally between two and four months depending on the quality of the product and the exposure of the boat. If you use this type of wax, two to three applications per sailing season will give better results than a single annual application.
Modern synthetic sealants offer superior durability, often from six months to a year, making them more suitable for a single annual application. These products create a chemical bond with the gelcoat that is more resistant to washing and marine aggressions than traditional waxes. An application in the spring when it comes back into service will effectively protect your boat throughout the season.
The condition of your protection is easily checked using a water test. Pour water on a treated surface, if it beads up in small drops that roll easily, the protection is still active. If the water spreads out in a continuous film instead of beading, it's time to reapply your wax or sealant. This simple test allows you to adapt the application frequency to the real needs of your boat rather than blindly following a rigid schedule. A well-protected boat keeps its shine longer, is cleaned more easily, and is less subject to the aggressions of the marine environment.
How to avoid microcracks in gelcoat?
Gelcoat microcracks are mainly the result of excessive mechanical stresses, thermal shocks, or the natural aging of the material. Several preventive measures make it possible to significantly limit their occurrence. The first is to protect your boat from shocks and impacts by using appropriate defences during docking maneuvers, by avoiding leaving heavy objects lying around on deck, and by carefully handling equipment that may fall or hit the gelcoat.
Maintaining good hydration and protecting the gelcoat also plays an important role. A well-maintained gelcoat, regularly cleaned and protected by wax or sealant, maintains its flexibility and resistance to stresses better. Conversely, an unkempt, oxidized, and dried out gelcoat becomes brittle and cracks more easily. The regular application of protective products keeps the gelcoat in good condition and maintains a certain elasticity that allows it to better absorb stress without cracking.
Avoid sudden thermal variations that weaken the gelcoat. Never clean your boat in direct sunlight when the gelcoat is hot, as applying cold water will create a thermal shock that can cause microcracks. Also, do not apply icy products to a hot gelcoat. Allow your boat to cool before maintenance, or work early in the morning when temperatures are still moderate.
Pay particular attention to areas of structural stress such as corners, hardware attachment areas, chain passages, and areas where the laminate changes thickness or configuration. These areas concentrate mechanical stresses and therefore present an increased risk of cracking. Regular monitoring makes it possible to detect microcracks when they appear and to treat them immediately before they spread. A monitoring system like the Oria Marine IoT box can also remind you of these regular inspections and help you maintain a rigorous monitoring of the condition of your boat.
What are the signs that a professional should be involved?
Several signs should alert you and encourage you to consult a professional rather than attempt an intervention by yourself. Any structural problem with the hull or the deck is a reason for immediate consultation. If you notice soft or soft areas that indicate delamination, significant cracks in stress areas, visible structural deformations, or extensive damage following an impact, call in a boat-building expert without delay.
Extensive osmosis also requires the intervention of a professional. Some isolated blisters can be treated by a competent owner, but widespread osmosis with numerous blisters spread over a large area of the shell requires a complete professional treatment including stripping, controlled drying and application of a barrier system according to specific protocols.
Recurring problems that you can't solve despite several attempts deserve the expert eye of a professional. If a crack always comes back to the same place after repair, if water infiltration persists despite your interventions, if equipment continues to malfunction despite your efforts, it is probably because a more complex underlying problem requires technical expertise that you do not have.
Interventions on safety-critical systems, such as keel bolts, rudder systems, or propulsion units, should always be carried out by qualified professionals. These elements directly affect your safety at sea and their failure could have dramatic consequences. The savings made by carrying out these interventions yourself are not worth the risk involved. Finally, if you simply feel that you don't have the skills, tools, time, or physical strength to do a maintenance task properly, hiring a professional is always the wisest decision and often the most economical in the long run.


