

Maritime navigation requires constant vigilance and a thorough understanding of the environment in which you operate. Knowing how to read a nautical chart is not just a technical skill, it is truly the key to ensuring your safety and that of your crew at sea. Each symbol, color, and line drawn on a map contains crucial information that can make the difference between a peaceful exit and a dangerous situation. Whether you are a beginner sailor looking to understand the basics or an experienced sailor looking to improve your knowledge, mastering marine cartographic reading is a continuous learning experience. Modern nautical charts concentrate a wealth of information that, once deciphered correctly, will allow you to anticipate dangers, plan your routes accurately, and navigate with confidence. In this comprehensive article, we'll explore together all the essential aspects of reading a nautical chart, from basic symbols to advanced techniques for avoiding dangerous areas.
Understanding the basics of a nautical chart
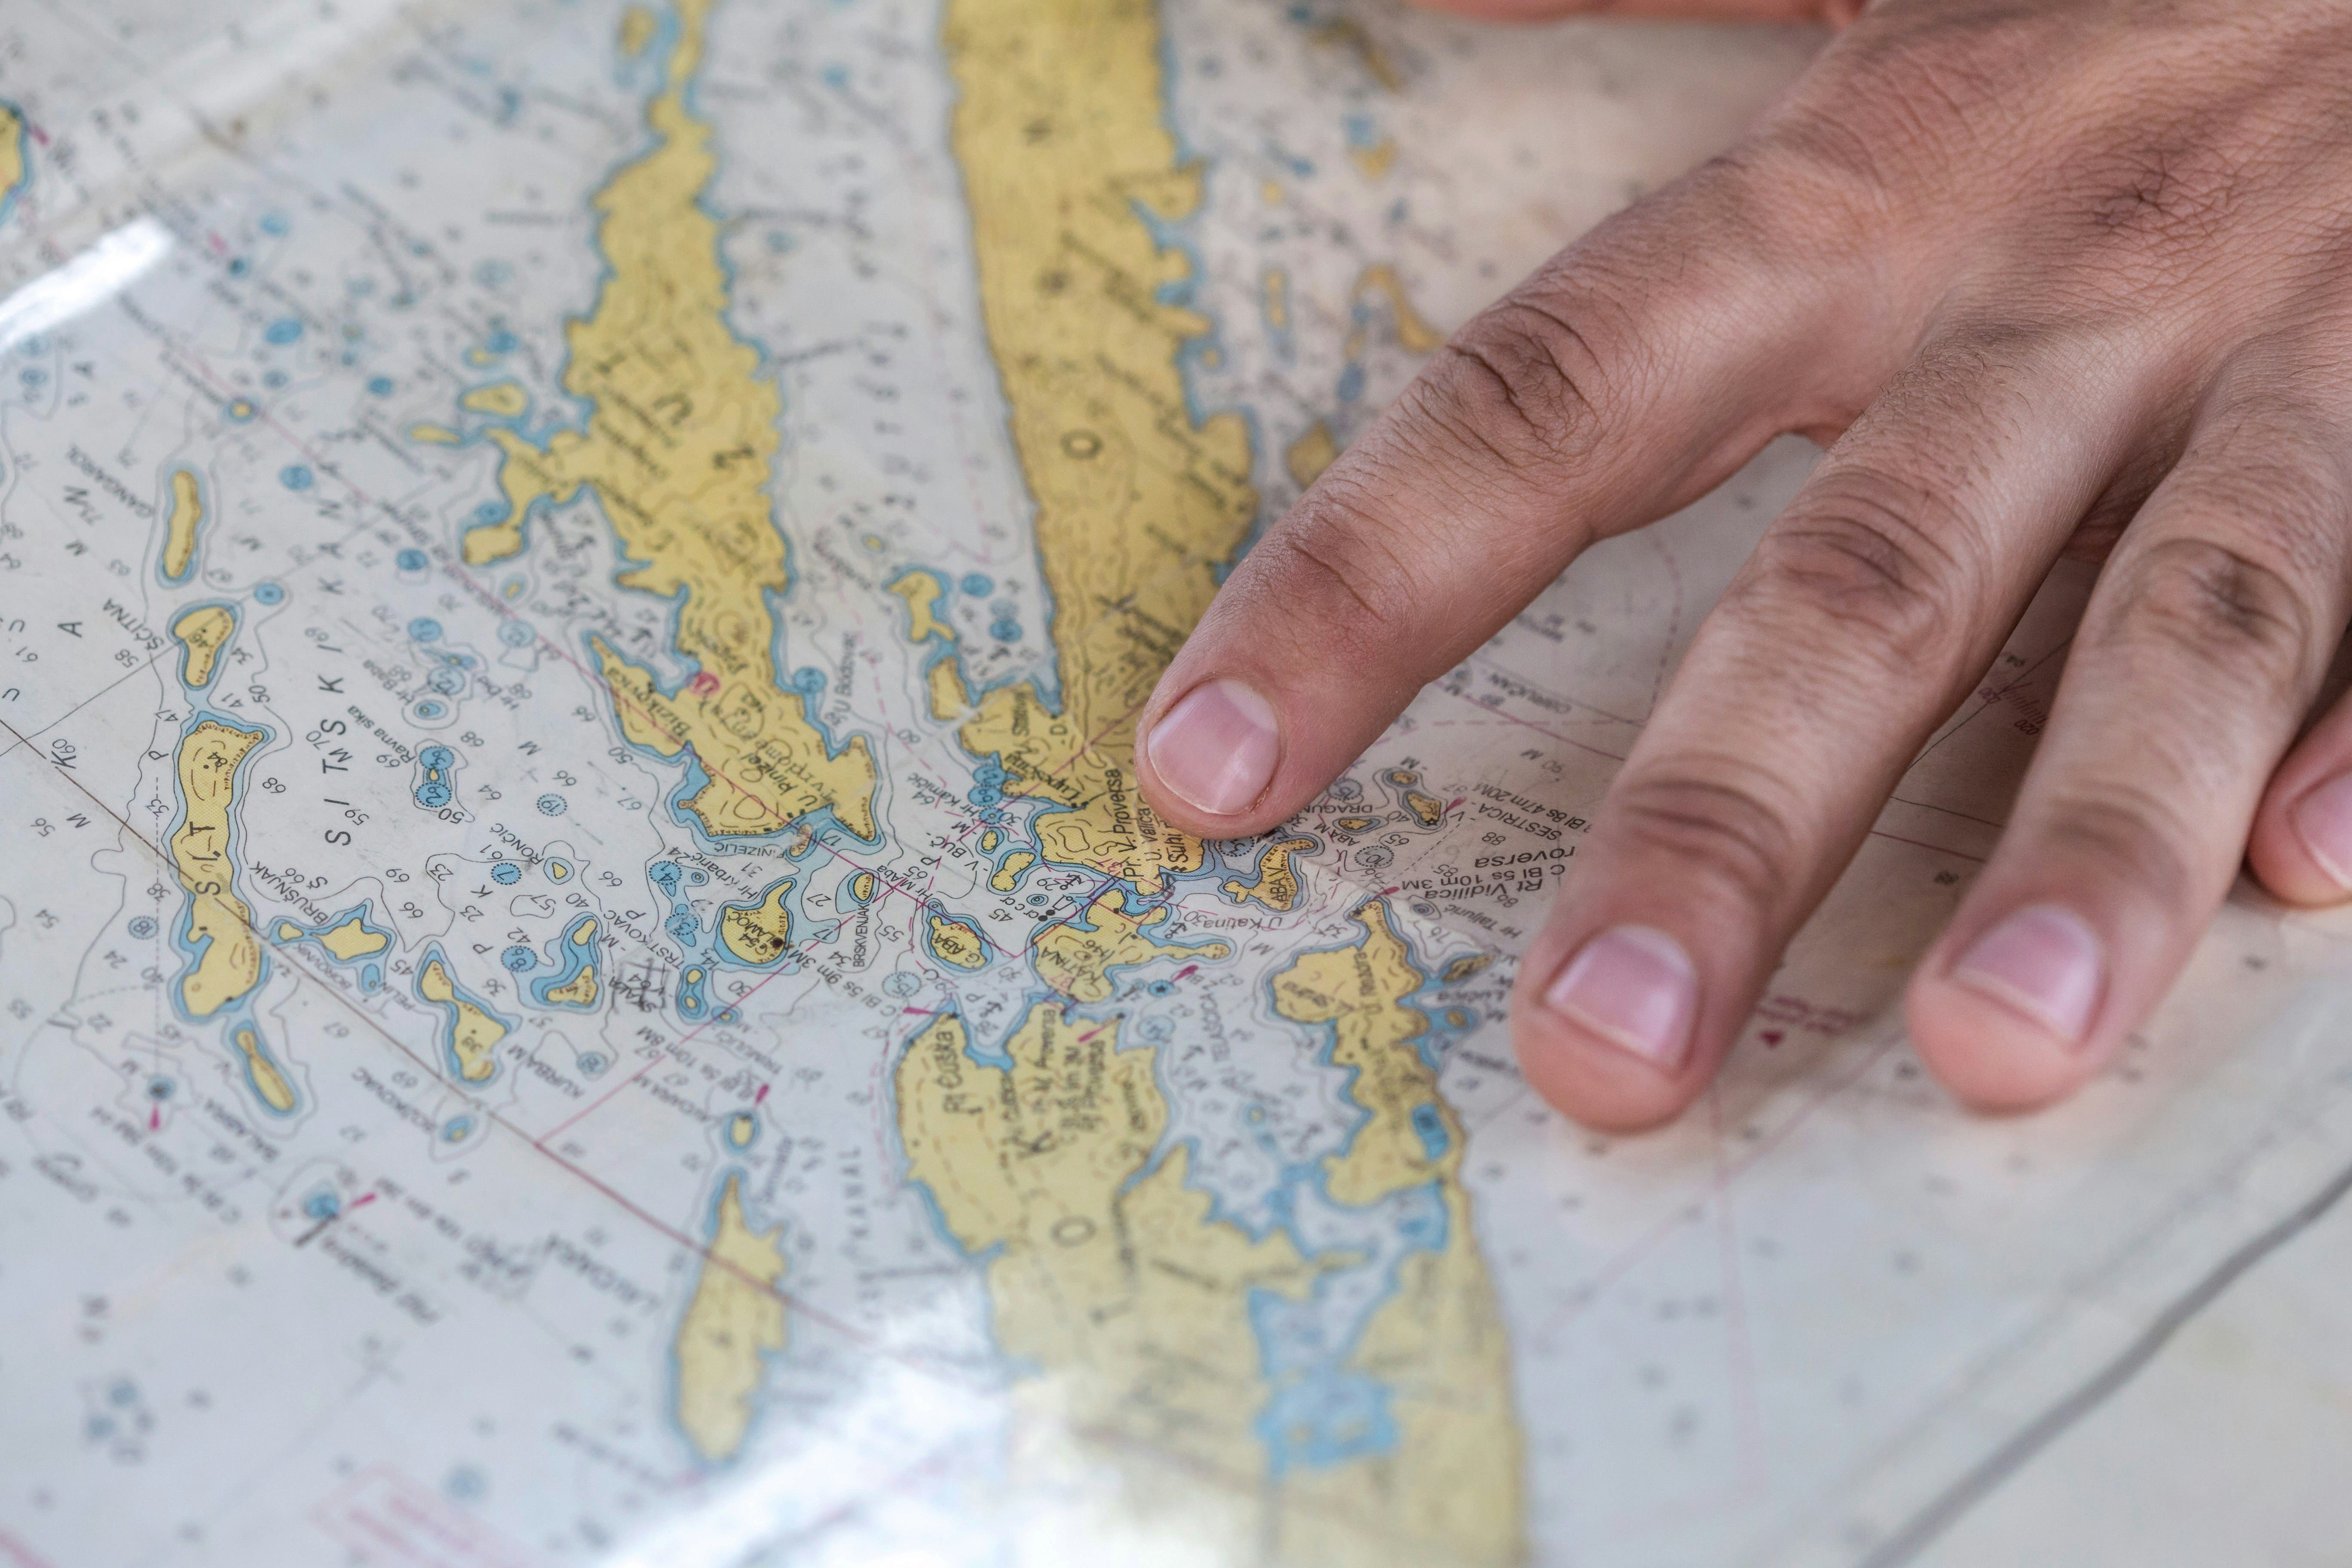
Before you can navigate safely, it is essential to understand how a nautical chart works and what information it contains. A nautical chart is not simply a visual representation of the coastline, it is a sophisticated technical document that condenses decades of hydrographic surveys and marine observations. Each element on the map has been carefully measured, verified and standardized according to international conventions that allow all mariners in the world to share a common language. This standardization ensures that a French navigator will be able to understand a Norwegian or Australian map by recognizing the same symbols and colors. Familiarity with these universal conventions is therefore the first and indispensable step for anyone who wants to set sail safely.
The different types of nautical charts: paper, electronic and raster
Nautical charts now come in several formats, each with specific advantages adapted to different navigation situations. Traditional paper maps remain the historical reference and maintain unparalleled reliability, not depending on any source of energy and offering an immediate overview of your navigation area. They allow you to directly annotate your route, to report remarkable points and to work with traditional instruments such as the compass and the Cras ruler. Vector electronic charts, often referred to by the acronym ENC (Electronic Navigational Charts), represent the modern evolution of marine cartography and offer remarkable interactive features. These smart maps allow you to show or hide certain information according to your needs, to automatically calculate routes and to integrate safety alarms when approaching dangerous areas. Raster maps, on the other hand, are essentially digitized versions of paper maps, maintaining their traditional appearance while benefiting from certain digital advantages such as zoom and the ability to display your GPS location in real time.
The scale of a nautical chart and its importance for accuracy
The scale of a nautical chart directly determines the level of detail you can use for your navigation and significantly influences your ability to identify potential hazards. A small-scale map, for example at 1:250000, covers a large geographic area and is perfect for planning a long trip on the high seas or a coastal crossing over several tens of miles. However, this big picture comes at the expense of fine details, and many local obstacles simply won't be represented at this scale. Conversely, a large-scale map like a 1:10000 or even a 1:5000 port map will display every buoy, rock, and port facility with remarkable accuracy, allowing you to navigate safely in congested or shallow areas. Choosing the appropriate scale therefore depends entirely on your type of navigation: you will use small-scale maps for offshore navigation and large-scale maps as soon as you approach coastlines or enter a port. A savvy navigator always has a comprehensive portfolio of maps covering various scales to suit each phase of their journey.
Essential symbols and colors you need to know
Nautical charts use a universal color code that makes it possible to instantly identify the nature of the areas represented and their depth characteristics. Blue, in its various shades, consistently indicates areas of water, with darker hues generally representing deeper water and lighter hues signaling shoals or shallow areas. White or very light blue refers to areas where the depth is sufficient for standard navigation, while green or blue-green highlights shallow areas that require particular vigilance depending on the draft of your boat. Yellow or beige represents areas that open at low tide, warning you that low-tide navigation would be impossible or extremely dangerous. Finally, gray or brown indicates land that is permanently emerged. Beyond colors, the symbols constitute a true maritime alphabet: a cross indicates a wreck, an asterisk indicates an outcropping rock, grouped dots represent coral reefs, and dashed lines mark the limits of restricted areas. Mastering these standardized symbols turns a seemingly complex map into a perfectly legible document that guides you accurately.
Identify underwater and coastal hazards
The ability to quickly identify hazards on a nautical chart is probably the most vital skill for any responsible navigator. Marine hazards take many forms, from visible obstacles like emerging reefs to sneaky threats like rockheads just below the surface. Each of these hazards has its own cartographic representation, designed to draw your immediate attention and allow you to plan a safe route. Understanding these representations requires methodical learning, but once acquired, this knowledge becomes a natural reflex that will allow you to scan a map in a few seconds to identify areas to avoid. Reading the dangers is not limited to identifying isolated symbols, it also involves understanding the general geographic context, the dominant currents, and the interaction between the various factors that can turn a seemingly innocuous area into a deathtrap for ships.
Reefs, Shoals, and Rock Heads: How to Spot Them Quickly
Reefs, shoals and rock heads represent some of the most frequent and dreaded dangers in coastal navigation. On a nautical chart, these obstacles are represented by very distinctive symbols designed to catch your eye immediately. A reef that discovers at low tide usually appears with a thick black outline and a yellow or beige infill, clearly signaling to you that it periodically emerges and is an absolute danger during low-water phases. Rock heads that are flush or very close to the surface are indicated by a black asterisk surrounded by a small circle, sometimes accompanied by a minimum depth in numbers, for example “1.5m”, allowing you to quickly calculate whether your draft allows a safe passage. The less critical but nevertheless dangerous shoals for deep-draft vessels appear in areas that are green or light blue in color, with scattered probe numbers indicating the depths measured at various points. An effective technique for spotting these dangers is to systematically scan your intended route by looking for any areas that are colored differently than the standard deep blue, as this color change invariably signals a decrease in depth that requires your attention.
Sandbanks and silting areas: interpreting the seabed
Sandbanks are a particular type of maritime hazard, all the more sneaky because they can move over time under the effect of currents and storms. On marine maps, sandy areas are generally indicated by the term “S” (for sand) or “sable” in French, accompanied by probe numbers specifying the depth at various points on the bank. These areas frequently appear in green or light blue hues, signaling their shallow depth, and often have irregular contours reflecting their moving nature. Estuaries and river mouths are prime locations for the formation of sandbanks, as the constant flow of sediments brought by the watercourse is gradually deposited where maritime waters meet. The nature of these banks makes them particularly treacherous: unlike a rock whose position remains fixed for decades, a sandbank may have moved or changed significantly since the last update of your map. Some maps explicitly indicate this instability with statements like “approximate position” or “subject to change”, warning you that caution is needed. A modern device like the Oria Marine IoT box can also be valuable in these situations by providing you with real-time depth data that complements the information on your map.
Wrecks, obstructions and submarine cables: specific symbols to watch out for
Underwater wrecks and obstructions are particularly serious dangers because they can seriously damage your hull or propeller, even when they lie several meters below the surface. Nautical charts use several distinct symbols to represent these dangers depending on their nature and exact position. A dangerous wreck whose upper part is less than twenty meters from the surface is generally indicated by the symbol of a ship's hull seen in profile, accompanied by a dotted circle and the exact depth of the highest point of the wreck. A wreck that is completely submerged but not dangerous for surface navigation appears with a similar symbol but without a warning circle, sometimes accompanied by the words “wreck cleared by more than X meters”. Various obstructions, such as isolated rocks, collapsed bridge pillars, or submerged artificial structures, are marked by specific symbols adapted to their nature. Submarine cables, whether electrical or telecommunications, are the subject of a particular representation with a line composed of alternating lines and points, often accompanied by the mention “cable” or “cable” and sometimes by an area forbidden to anchor on each side. These cables deserve special attention as damaging them can have serious legal consequences in addition to the risk of entangling your anchor.
Currents, tides and turbulence zones: reading hydrographic indications
Hydrographic phenomena such as currents, tides and areas of turbulence are invisible but daunting dangers that can quickly turn quiet navigation into a perilous ordeal. On nautical charts, strong currents are indicated by arrows showing their dominant direction, often accompanied by numbers specifying their average speed in knots during periods of high water and dead water. The areas where opposing currents meet, called waves or races, are particularly dangerous because they generate a rough and unpredictable sea even in calm weather. These areas usually have a specific name on the map, such as “Raz de Sein” or “Race of Alderney,” and are often accompanied by textual warnings about their characteristics. Tide information is essential for understanding how depth will vary as you navigate, and maps consistently show the coefficients and reference ports to calculate water levels at any given time. Areas of turbulence caused by shoals or particular configurations of the underwater relief are sometimes indicated by textual mentions such as “rough seas” or “swirls”. Understanding these hydrographic phenomena requires careful study before departure and regular consultation of tide tables to anticipate the conditions you will encounter.
Read depth information
The depth of the water under your keel is undoubtedly the most critical information for your immediate safety while navigating. An incorrect or careless reading of the depths can lead to a grounding, potentially catastrophic for your boat and dangerous for your crew. Nautical charts present depth information in several complementary ways, each providing a specific type of information that, combined with the others, gives you a three-dimensional view of the underwater landscape. Mastering the reading of these different representations requires practice, but this skill quickly becomes intuitive with experience. It is fundamental to understand that all the depths indicated on a nautical chart are referenced to a theoretical reference level called hydrographic zero, and that the actual depth at a given moment will depend on the state of the tide.
Understanding probes and hydrographic zero
Probes, numbers scattered over the entire surface of the nautical chart, represent depth measurements taken during hydrographic surveys and are your main source of information on underwater relief. Each probe indicates the vertical distance between the seabed and a specific reference level called hydrographic zero or chart zero. This reference level generally corresponds to the level of the lowest possible astronomical seas, i.e. the lowest level that the sea can theoretically reach under normal conditions. This convention guarantees a maximum margin of safety since, most of the time, the actual depth will be greater than that indicated on the map thanks to the effect of the tide. Probes are expressed in meters and decimeters on modern French maps, although you may still encounter ancient maps using fathoms or feet in some regions of the world. A careful navigator should always check the unit used by consulting the chart cartridge before interpreting the depths. The density of the probes varies by area: in well-mapped channels and busy areas, you will find numerous probes offering an accurate picture of the terrain, while in less frequented areas or on the high seas, the probes will be more spaced apart and will require mental interpolation to estimate the depth between two measured points.
How to interpret bathymetric lines
Bathymetric lines, also called isobaths or underwater level curves, are an extraordinarily powerful visual tool for quickly understanding the topography of the seafloor. These lines connect all points with the same depth, just as land level curves connect points of the same altitude on a typical topographic map. Isopaths are generally drawn at regular intervals, for example every two meters in shallow coastal areas, every five or ten meters in areas of medium depth, and every twenty or fifty meters in deeper areas. Some particularly important lines, such as the 10-meter line or the 20-meter line, are often drawn thicker than the others because they represent critical thresholds for many types of ships. The visual interpretation of isobaths allows you to instantly deduce the slope of the bottom: very close lines indicate a bottom that is rapidly descending or rising, often indicating a rocky drop off or an underwater cliff, while widely spaced lines reveal a gently sloping bottom, typical of sandy or muddy areas. This reading becomes particularly valuable when planning anchorages, as it helps you identify plateaus of stable depth where to anchor safely, avoiding slopes where your anchor might hunt.
Adapt your navigation according to the boat's draft
Knowing exactly the draft of your boat is absolutely essential information to navigate safely, because it is this figure that determines the minimum depth required under your hull at all times. Draught is the vertical distance between the waterline and the lowest point on your boat, usually the keel or rudder. For a sailboat with a fixed keel, this value remains constant, but for a lift-off sailboat or a catamaran, it varies depending on the configuration and requires that you know both the draft (high drift) and (low) drift. When planning your route on the map, you should always add a margin of safety to your draft to take into account several factors: the position of the boat which temporarily increases the draft downwind, the state of the sea which can cause significant pitching, the uncertainty about the exact positions of the dangers, and the possibility of errors in your tide calculations. A safety margin of one meter is a reasonable minimum in normal coastal navigation, but this margin should be increased to two meters or more in case of difficult conditions or rough seas. Some navigators use the concept of a “waterway” by adding a fixed margin to their draft that they consider to be their absolute minimum depth, thus simplifying the reading of the map by simply avoiding any area with a depth less than this value.
Analyzing navigation aids on the map
Navigation aids are an indispensable network of visual and luminous landmarks that have guided mariners for centuries. This equipment, whether majestic lighthouses, modest beacons or floating buoys, is all carefully recorded on nautical charts with standardized symbols that specify not only their position but also all their technical characteristics. Understanding these symbols and knowing how to use the information they provide turns your navigation at night or in reduced visibility into a much safer and more confident experience. Each navigational aid has been placed in its specific location for a specific reason, usually to mark a hazard, indicate a navigable channel, or serve as a landmark to confirm your location. Learning to read them correctly and to use them methodically is a fundamental skill that will accompany you throughout your life as a navigator.
Lights, buoys, beacons: understanding their codes and characteristics
Maritime lights, whether they equip monumental lighthouses or simple buoys, use a codified language based on the color of light, the rhythm of its flashes and its luminous range. On a nautical chart, these characteristics are indicated by an abbreviated sequence that requires a little learning but quickly becomes intuitive. For example, a light indicated “Fl (2) R 10s 15M” informs you that it is a flashing light (Fl for flashing), emitting two successive flashes (2), red (R for red), with a complete cycle that is repeated every ten seconds (10s), and visible in clear weather at a distance of fifteen nautical miles (15M), with a complete cycle that is repeated every ten seconds (10s), and visible in clear weather at a distance of fifteen nautical miles (15M). The colors of the lights follow a precise logic in the international marking system: red marks the port side of a channel when entering a port or going up an estuary, while green marks the starboard side. Cardinal buoys, which indicate the position of a danger in relation to the cardinal point where the buoy is located, display white lights with specific rhythms: continuous rapid flashes for the north, three flashes for the east, six flashes plus one long flash for the south, and nine flashes for the west. This international standardization allows any navigator to instantly understand the message transmitted by a navigation aid, regardless of their nationality or the region where they navigate.
Sectors of visibility and bright flashes: avoid misinterpretations
Some headlights emit different colors of light depending on the angular sector from which you observe them, creating areas of white, red, or green light that precisely delineate navigable areas and dangerous areas. These visibility areas are represented on the map by lines radiating from the lighthouse, with annotations specifying the color visible in each area and often the exact bearings that delineate these areas. A red sector generally indicates a dangerous area where you should not venture, such as the presence of reefs or shoals, while a white sector marks the safe navigation area. This intelligent use of colored sectors allows a navigator to instantly know if they are in a safe area simply by observing the color of the fire they see. However, this method requires a certain degree of caution in interpretation because the boundaries between sectors are never absolutely clear, and a slight uncertainty about your exact position or the orientation of your boat can cause you to perceive the wrong color. In addition, atmospheric conditions can alter color perception, especially during fog or rain. It is therefore wise to cross-reference this information with other navigation elements rather than relying solely on bright areas to confirm your position.
Alignments and bitters: how to use them for safe navigation
Alignments are an extraordinarily accurate traditional method for safely navigating congested areas or for verifying your exact position. An alignment consists of two remarkable objects, natural or artificial, which, when viewed superimposed from a specific location, confirm that you are on a specific line drawn on the map. Nautical charts indicate official alignments by two parallel lines connecting the two bitters, often accompanied by an annotation specifying the course to follow to stay on the line. These alignments can mark the axis of a navigable channel between reefs, the entrance to a port, or simply serve as a position line to confirm your navigation. The remarkable advantage of alignments lies in their absolute precision, independent of any electronic or magnetic instrument, as they rely solely on your direct visual observation. Isolated bitters, on the other hand, are remarkable visual landmarks such as a characteristic bell tower, a distinctive water tower, an industrial chimney, or a particularly recognizable cape, all reported on the map with their specific symbol. By taking bearings on two or three different bitters and drawing these lines onto your map, you can determine your position with excellent precision using the cross-bearing point method, a classic technique that remains valuable even in the age of GPS.
Anticipate forbidden or restricted areas
The sea may seem free and borderless, but many areas are actually subject to navigation restrictions for a variety of reasons ranging from military security to environmental protection. Ignoring these restrictions may expose you not only to physical dangers but also to heavy administrative or criminal penalties. Nautical charts always show these restricted areas with specific symbols and boundaries, although it is sometimes necessary to consult additional nautical documents to obtain full details of the applicable restrictions. A responsible navigator must be aware of all the restricted areas on his planned route and plan alternative routes if necessary. This particular vigilance is all the more necessary as some restrictions change according to the seasons, the hours of the day or even according to temporary activities, the announcement of which may only be announced by notices to mariners.
Military zones, nature reserves and protected areas
Military zones are probably the most serious restrictions you can encounter at sea, as violating them can have dramatic consequences ranging from being fined to being intercepted by armed forces. These areas are clearly delineated on nautical charts by thick dashed lines forming a closed perimeter, usually accompanied by the inscription “forbidden military zone” or “temporarily prohibited military zone”. Some military zones are permanently banned, often because they serve as ranges of fire or contain sensitive installations, while others are only activated during military exercises announced by notice to mariners. Marine nature reserves and marine national parks impose different restrictions, generally motivated by the protection of fragile ecosystems or endangered species. In these areas, navigation may be completely prohibited, limited to certain periods of the year, or subject to specific constraints such as the ban on anchoring or speed limits to protect marine mammals. The protection areas of Posidonia meadows in the Mediterranean, for example, prohibit anchoring to avoid the destruction of these underwater meadows essential to the ecosystem. These environmental restrictions deserve your respect not only to avoid fines but above all to contribute to the preservation of the maritime heritage of which we are all guardians.
Recommended shipping lanes and lanes
In areas of heavy maritime traffic, shipping corridors and traffic separation schemes have been established to organize ship traffic and reduce the risk of collisions. These systems, which are particularly present in busy straits, around major commercial ports and in some congested coastal passages, are clearly represented on nautical charts by parallel lines delineating traffic lanes, with arrows indicating the mandatory direction of traffic in each lane. Ships are required to navigate in the lane corresponding to their general direction of travel and to cross these devices only at an angle as close as possible to ninety degrees. For boaters, these devices may seem restrictive, but they are in reality a valuable protection against cargo ships and tankers whose mass and inertia make any evasive maneuver difficult. Some areas also have recommended coastal lanes specially designed for small boats, allowing you to sail along the coast away from commercial traffic concentrated in the main channels. Respecting these corridors is not just a matter of regulations, it is a fundamental safety measure that can save your life by keeping you away from professional vessels whose crews do not always expect to encounter sailing boats in their shipping lanes.
Temporary restrictions: how to identify them on recent maps
Temporary restrictions present a particular challenge for mariners as they are generally not on permanent nautical charts and require regular consultation of notices to mariners. These restrictions can be established for a wide variety of reasons: maritime work such as cable laying or the construction of offshore wind turbines, sporting events such as regattas or water skiing competitions, dredging operations in a channel, scientific research, or even mine clearance operations. Notices to mariners, published regularly by maritime authorities, announce these restrictions with their dates of application, their precise geographic coordinates and the exact nature of the limitations imposed. A careful navigator systematically consults the latest notices to mariners before each sea trip, especially when navigating in busy areas or near major ports where temporary works and events are frequent. Some mobile applications and specialized websites now compile this information and can even display it directly on an electronic card, making it considerably easier to consult it. Modern maritime surveillance systems, like the one offered by Oria Marine with its IoT box, can also alert you to these temporarily forbidden areas if you approach their limits, adding an additional layer of security to your navigation.
Use the nautical chart and modern tools together
Technological change has radically transformed navigation methods in recent decades, introducing electronic tools of remarkable precision and reliability. GPS, electronic chart plotters, digital sounders, and now sophisticated mobile applications have democratized navigation capabilities that were once reserved for professional vessels equipped with expensive instruments. However, this technological revolution does not make traditional methods of navigating with paper charts, compasses, and mechanical instruments obsolete. On the contrary, a truly professional approach to modern shipping involves harmoniously combining the advantages of contemporary technologies with the timeless reliability of classical methods. This philosophy of redundancy and complementarity ensures that you will always have the means to navigate safely, no matter what circumstances you may encounter.
GPS, trackers and navigation applications: advantages and limitations
The GPS system revolutionized navigation by offering positioning accuracy that would have seemed miraculous to mariners fifty years ago. Modern trackers display your position in real time on an electronic map with a margin of error generally less than ten meters, allowing you to track your progress with extraordinary precision. These systems can automatically calculate optimal routes, alert you when you deviate from your intended path, and set off alarms if you approach previously identified dangerous areas. Mobile navigation applications, which are becoming more and more sophisticated, bring remarkable features such as the integration of real-time weather data, the sharing of positions with other browsers, and even user communities that report the dangers encountered. However, all of these systems share a common weakness: their total dependence on electrical power. A simple battery failure, a short circuit caused by seawater, or a lightning strike can instantly deprive you of all your electronic instruments. In addition, although rare, the GPS signal can be disturbed by interference, extreme weather conditions, or even by military operations in certain sensitive areas. A wise browser therefore never relies entirely on these technologies, no matter how reliable they are in normal times, but always maintains alternative means of navigation that are immediately accessible.
Why the paper card is still essential in the event of an electronic failure
The paper nautical chart represents a technology that is centuries old, and yet it remains relevant today as a fundamental safety element on board any boat. Unlike electronic systems, a paper card does not require any energy source, does not fear humidity once laminated, is shock-resistant and remains perfectly legible in sunlight as in the dark with a simple flashlight. In the event of a total failure of your electronic systems, which may occur more easily than one might imagine, your paper map allows you to continue to navigate using traditional methods of navigating by estimate and by bearings. The overview offered by an unfolded paper map also has a distinct cognitive advantage compared to tracker screens that show only a limited portion of the area and can give a false impression of safety by masking dangers located just outside the displayed area. Many experienced navigators maintain the habit of regularly reporting their position on the paper map even when they have fully functional electronic instruments at their disposal, thus maintaining their traditional navigation skills and maintaining a permanent awareness of their global geographical location. This practice may seem superfluous in good weather and with all operational systems, but it can really save you when conditions worsen and fatigue, stress, or a failure deprive you of your usual electronic tools.
Updating the charts: manuals, editions and nautical information
The seabed, navigational aids, and maritime regulations are constantly evolving, making it essential to regularly update your nautical charts to ensure that they accurately reflect current reality. An outdated map can mislead you by indicating a light that has been moved, by omitting a new buoy recently installed, or by not mentioning a new navigation restriction established after it was published. For paper maps, national hydrographic services regularly publish correction booklets called “Mariners Advisory Group” which list all the changes to be made to official maps. A conscientious navigator should ideally put these handwritten corrections on his charts before each important navigation, although this tedious practice is unfortunately often overlooked by boaters. A more practical alternative is to periodically buy new editions of the charts you use frequently, especially for your usual sailing areas. E-charts have a significant advantage in this area since their updates can be downloaded and applied automatically, ensuring that you are always browsing with the most up-to-date information. However, even with electronic cards, it is still crucial to check the availability of updates regularly and to install them, as some systems do not do this automatically. The date your maps were published or last updated should always be checked before navigating, and any maps older than two or three years should be considered potentially outdated and used with extra caution.
Practical tips for avoiding dangerous areas
Beyond the simple technical ability to read a nautical chart, developing a rigorous methodology and safe habits is the essence of responsible navigation. Maritime accidents rarely result from a single isolated error, but rather from an accumulation of small carelessness and a lack of systematic preparation. The most experienced mariners will tell you that safety at sea is based on a constant state of mind of vigilance, meticulous preparation and humility in the face of natural forces. This philosophy is translated into concrete practices that, although they may seem restrictive at first, quickly become natural reflexes and accompany you throughout your life as a seafarer. By integrating these methods into your sailing routine, you drastically reduce the risk of incidents and give yourself the best chance of returning to port safely after each sea trip.
Methods of cross-referencing information for greater security
The fundamental principle of maritime safety is to never rely on a single source of information, but to always cross-reference several independent elements to confirm your situation and your decisions. This information redundancy creates successive layers of security that protect you from individual errors, hardware failures, and ambiguous situations. In practice, this means that you should systematically compare your GPS position with visual measurements on bitters identified on the map, check that the depths displayed by your sonar correspond to the expected values according to your position on the map, and confirm that the lights and buoys you observe correspond to those indicated on your planned route. This approach becomes particularly critical in congested or dangerous areas where even minimal positional error could have serious consequences. For example, before crossing a narrow passage between reefs, a careful navigator will check his position by several independent methods, ensure that the depth under his keel remains much greater than his draft plus the margin of safety, carefully observe the currents and their effect on his actual trajectory, and maintain a constant visual identification of the bitters or navigational aids that mark the passage. This multiplication of checks may seem excessive, but it is the difference between professional navigation and careless amateur navigation.
Early reading before the release: prepare your way
Carefully preparing your route before you even cast off is probably the most profitable time investment in terms of maritime safety. This preparation, which should be systematic for any outing beyond a simple familiar coastal walk, consists of carefully studying the nautical charts of your intended navigation area to identify any potential dangers, plan safe crossing points, provide alternatives in the event of a change in conditions, and familiarize yourself with all the particularities of the area. Concretely, you should trace your route on the paper map or in your electronic tracker, making sure to maintain a comfortable safe distance from all identified dangers, taking into account your draft and the predicted tides. Write down mentally or in writing the successive courses to follow, the distances between each change of course, and the bitters or navigational aids that you should see at each stage to confirm your progress. Also identify the ports or refuge anchorages available along your route in case you have to interrupt your navigation due to damage, a medical problem or a deterioration in the weather. This preparation may take an hour or more for complex navigation, but it will be more than offset by the peace of mind you will experience at sea knowing exactly where you are going and how to get there safely.
Adapt the speed and keep an active watch
The appropriate speed for coastal navigation depends on multiple factors including visibility, traffic density, area complexity, and your familiarity with the environment. A fundamental rule states that you should always navigate at a speed that allows you to stop your boat or maneuver to avoid danger within the effective visibility distance you have. For reduced visibility, fog or nocturnal navigation, this rule requires a significant reduction in speed, even if your electronic equipment gives you the impression that you are in perfect control of the situation. Excessive speed is an aggravating factor in almost all marine accidents, as it reduces your reaction time, increases stopping distance, and dramatically amplifies the consequences of an impact. Active surveillance, which consists of constantly and systematically observing your environment from all directions, is your first line of defense against all maritime dangers. This monitoring should not be limited to looking ahead, but should include regular 360-degree scans to detect other ships, approaching weather changes, dangerous floating objects, and to confirm your position in relation to coastal waters. In dangerous areas or during delicate maneuvers, assign a crew member specifically responsible for monitoring while you focus on navigation, creating a separation of duties that greatly improves overall safety. Modern technologies like embedded IoT systems can usefully complement this human intelligence by providing automatic alerts on certain dangers, but they should never be a complete substitute for it.
FAQS
What are the most important symbols to know on a nautical chart?
Priority symbols to master include those representing immediate dangers to navigation: rocks that are flush or very close to the surface (asterisks surrounded by circles), dangerous shipwrecks (hull symbol with depth), discovery areas (colored yellow or beige), and reefs (represented by green areas with coral symbols). Navigation aids are the second essential group: lights with their codified characteristics, cardinal and lateral buoys with their distinctive colors, and alignments marked by two parallel lines. Finally, become familiar with symbols that indicate restricted areas such as military zone perimeters, nature reserve boundaries, and traffic separation schemes. A good learning method is to regularly consult the complete legend provided with your charts and to systematically identify each new symbol you encounter during your navigation preparations.
How do I know if an area is dangerous or forbidden to navigate?
A danger zone is mainly recognized by its color and the presence of warning symbols: very light green or blue hues indicate shallow depths, yellow or beige areas indicate open shoals, and the presence of asterisks, crosses, or other danger symbols confirms the perilous nature of the area. Areas prohibited to navigation are delimited by thick dashed lines forming a closed perimeter, usually accompanied by textual annotations such as “forbidden zone” or “military zone.” Some restrictions are indicated by angular sectors marked by lines radiating from a central point, especially for shooting zones or military exercise areas. To be absolutely certain of the status of an area, always consult the sailing instructions associated with the map and check the advisories to recent mariners who may announce temporary restrictions that have not yet been reported on your map. In case of doubt about the interpretation of a symbol or a delimitation, the precautionary principle requires considering the area as potentially dangerous and providing an alternative route.
How do you tell a shoal from an outcrop rock?
The distinction between a shoal and an outcrop rock is based on three complementary criteria displayed on the nautical chart: the color of the area, the symbol used, and the depth shown. An outcropping rock, which emerges at low tide or remains dangerously close to the surface even at open sea, is represented by a black asterisk often surrounded by a small circle and placed in an area colored yellow or beige if it discovers, or accompanied by a very shallow depth (generally less than one meter) if it remains slightly submerged. A shoal, which represents a rise in the sea floor remaining at a greater depth, appears in a green or light blue area without an asterisk symbol, with probe numbers indicating depths generally between two and ten meters. The close bathymetric lines around a shoal reveal its nature as an isolated underwater relief emerging from a deeper bottom. This distinction is critical because an outcropping rock represents an absolute danger for all ships, while a shoal can be safely crossed by shallow-draft boats taking into account the state of the tide.
How often should you update your nautical chart?
The ideal update frequency depends on how intensively you use your navigation areas and the type of maps you use. For paper maps of areas you visit regularly, an annual check of the available corrections is a reasonable minimum, with a new complete edition every two to three years for active coastal areas where changes are frequent. Maps of areas that are rarely visited may remain valid longer, although it is still essential to check the advisories to mariners before each use. For electronic cards, take advantage of the ease of digital updates by systematically installing all new versions as soon as they are available, ideally by configuring your system to automatically download updates when an internet connection is available. Some maritime areas are evolving more rapidly than others: the areas around active commercial ports, offshore work areas, and regions subject to frequent changes in markings require increased vigilance. In addition to map updates, always review recent navigator advisories before major releases, as they announce changes that have not yet been incorporated into the official maps.
Can mobile applications replace a paper card?
Mobile marine navigation applications have reached an impressive level of sophistication and reliability, offering features that go far beyond what a paper map can provide: real-time GPS positioning, automatic route calculation, hazard alerts, hazard alerts, integration of meteorological data, and even connectivity with other onboard instruments. Under normal navigation conditions and with a smartphone or tablet properly protected from water and regularly recharged, these applications are remarkably effective tools that considerably facilitate modern navigation. However, they should never be your only means of navigation for several fundamental reasons. Electronic devices remain vulnerable to battery failures, water damage despite protections, software malfunctions, and GPS signal disturbances. In addition, their relatively small screen compared to an unfolded paper map limits your overall vision of the geographical location. A prudent approach is to use mobile applications as the main tools in normal navigation while always keeping paper maps covering your navigation area on board, kept up to date and immediately accessible in the event of an electronic failure. This redundancy represents a minimal investment compared to the security it guarantees.
How do I use probe lines to avoid grounding?
Probe lines, or isobaths, are an extraordinarily effective visual tool for maintaining safe navigation and avoiding any risk of grounding. The fundamental method is to identify on your map the probe line corresponding to your minimum safety depth, i.e. your draft increased by your usual margin of safety, and then plan your route so as to always stay on the “deep” side of this line. For example, if your boat draws 1.5 meters and you want to maintain a safety margin of 1.5 meters, you should constantly stay in areas where the 3-meter line separates you from the coast or shoals. During your actual navigation, monitor your sonar regularly to verify that the real depth corresponds to the values expected according to your position on the map, taking into account the current tide height which is added to the reference hydrographic zero. If you notice that the measured depths are decreasing when you thought you were sailing in deep water, stop your progress immediately and check your exact position before continuing. This navigation technique by mentally following the probe lines quickly becomes intuitive and allows you to subconsciously maintain a safe distance from dangers, turning the two-dimensional map into a three-dimensional representation of the underwater relief.


